
Get started with Client Requests — Firm administrator
As a firm administrator, you arrange access to Client Requests for your firm, control which request documents your staff can use and set up the client contacts your staff assign requests to. Before your team can send a request, your firm needs to be enabled for Client Requests. You can also enable Verity access so your staff can use the response validation agent to check client submissions.
Complete the following tasks to set up Client Requests for your firm:
-
Add request documents to your firm template
-
Set visibility conditions on request documents
-
Enable or disable requests in the product template
-
Train your staff on how to Enable Client Requests for an engagement
Add request documents to your firm template
Add request documents to your firm template so your staff can use them as a starting point in their engagements. You do this in the firm template rather than in an engagement, and the documents become available to your staff once you publish the template.
To add a request document to your firm template:
-
Go to Settings, select your product, then select the Manage Template page.
-
Select Open Draft.
-
On the Documents page, navigate to the folder where you want the request document.
-
Select Add (
 ) | Query Template.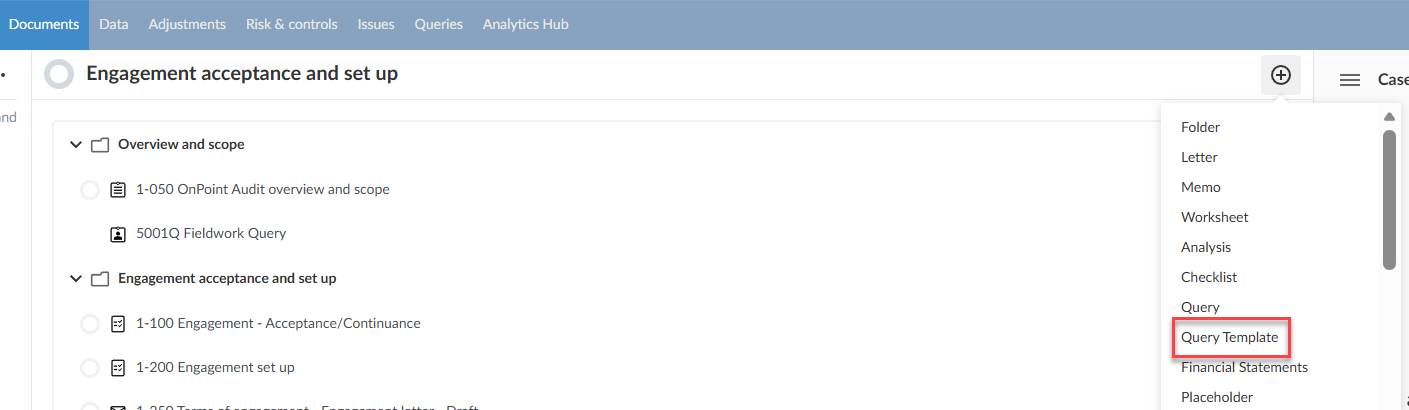
-
Enter an identifier and a name for the document.
You can add question sets and questions the same way you would in a request. To learn more, see Request information from clients.
To control which engagements the document appears in, select Edit visibility to set visibility conditions on it.
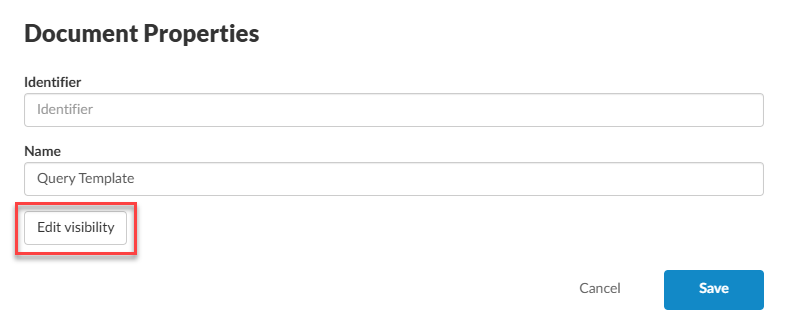
To learn more, see Set visibility conditions on request documents.
-
Select Save.
-
Once you're done, publish the template. Your staff will see the request document in any new engagement they create from that template version, subject to the visibility conditions you set.
To learn more about managing the firm template, see Manage the firm template.
Set visibility conditions on request documents
Set visibility conditions on a request document so it only appears in the engagements where it applies. For example, you can show a request document only in engagements for a particular industry or domain.
To set visibility conditions for a request document:
-
Select the document name to display the Document Properties dialog.
-
Select Edit visibility to display the Visibility Settings dialog.
-
Select Hide or Show from the drop-down list to specify the visibility action.
-
Select all or any to determine whether all conditions or one condition must be met for the visibility action to apply.
-
Select Add Condition.
-
Choose a condition type from the list, then specify the condition parameters.
-
Select Save.
Select Clear to remove all conditions and start over.
You can also copy visibility conditions to another request document. Select Copy, then open the Edit visibility dialog for the other document and select Paste.
To learn more, see What are visibility settings and Visibility conditions and examples.
Enable or disable requests in the product template
You can also control which of the requests already in the product template your staff can see. Hide the requests your firm doesn't need or show one that is hidden, so your staff only see the requests that apply to your engagements.
To hide or show a request, select the request document in the product template and set its visibility conditions. To learn more, see Set visibility conditions on request documents.
Add client contacts to an entity
Your staff assign requests to client contacts, so each contact needs an account and access to the right entity. An Entities Admin or Settings Admin can add client contacts to an entity.
To learn more, see Create an account for staff or contacts and Grant users and groups access to entities.
What's next
Once your firm has access and your client contacts are set up, your team is ready to start sending requests. Share the following resources to help them get started: