
Get started with Client Requests — Contact
Your accounting firm uses the client portal to ask you for the information and documents they need to complete your engagement. Everything they ask for appears in one place, with its own due date, so you can see what is outstanding and respond as you get to it.
This section covers everything you need to respond to your accounting firm's requests in the client portal.
Sign in for the first time
Your accounting firm creates your account and emails you when something needs your attention.
Activate your account
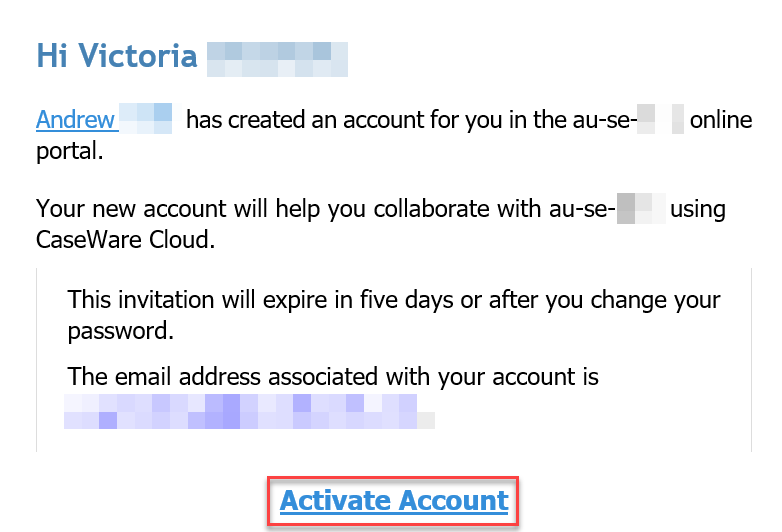
The first time a firm sends you a request, you receive an email inviting you to activate your account. Select the link in the email, create a password and sign in. After that, you sign in with the same email address and password each time.
Open the client portal
Once your account is set up, you'll receive an email whenever a request is assigned to you, a request item is assigned to you or a request item is returned to you. Select the link in the email to open the request in the client portal.
Each email tells you what is needed, so you do not need to sign in to check for new requests.
Where several things happen at once, they are grouped into a single email notification rather than sent separately.
View your requests
The client portal shows the requests assigned to you, with the status and due date of each one.
Working with more than one company
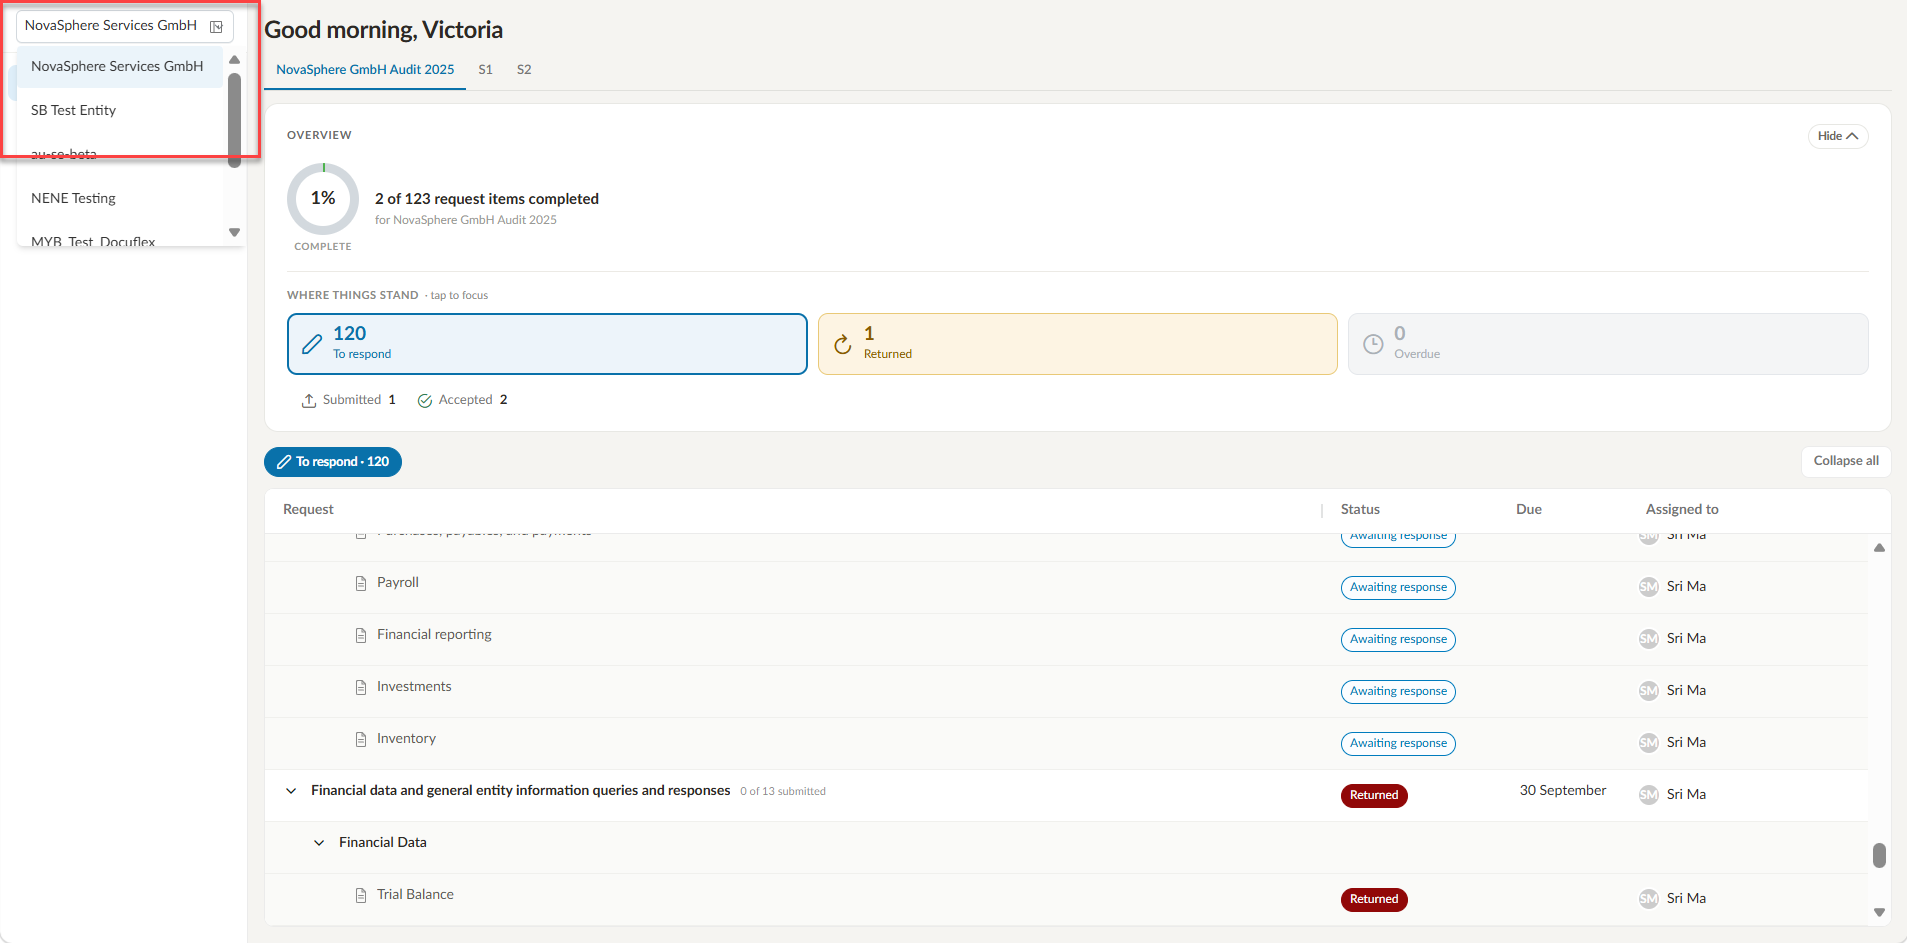
If you work with more than one company, select the company from the drop-down menu at the top left. The portal then shows the engagements where something is assigned to you, and you can move between them.
Your progress
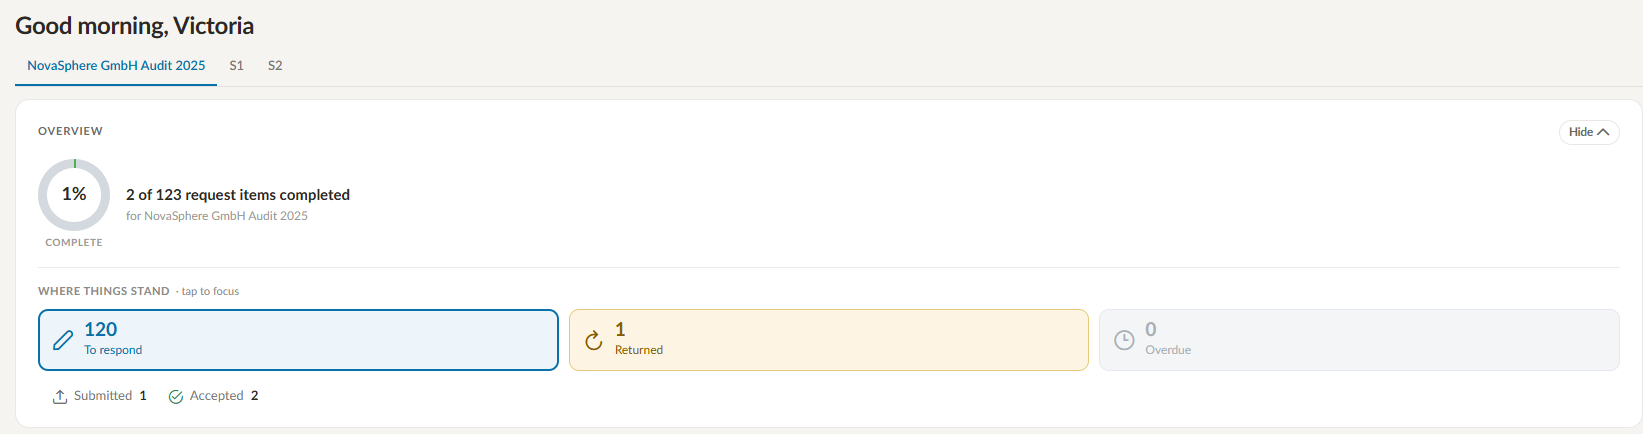
The OVERVIEW section displays your progress as a percentage and as a count of request items completed. Select Hide to collapse it to a single line and Show to open it again.
The WHERE THINGS STAND section displays how many items need a response, how many have been returned to you and how many are overdue. Select one to filter the list.
Question sets and request items
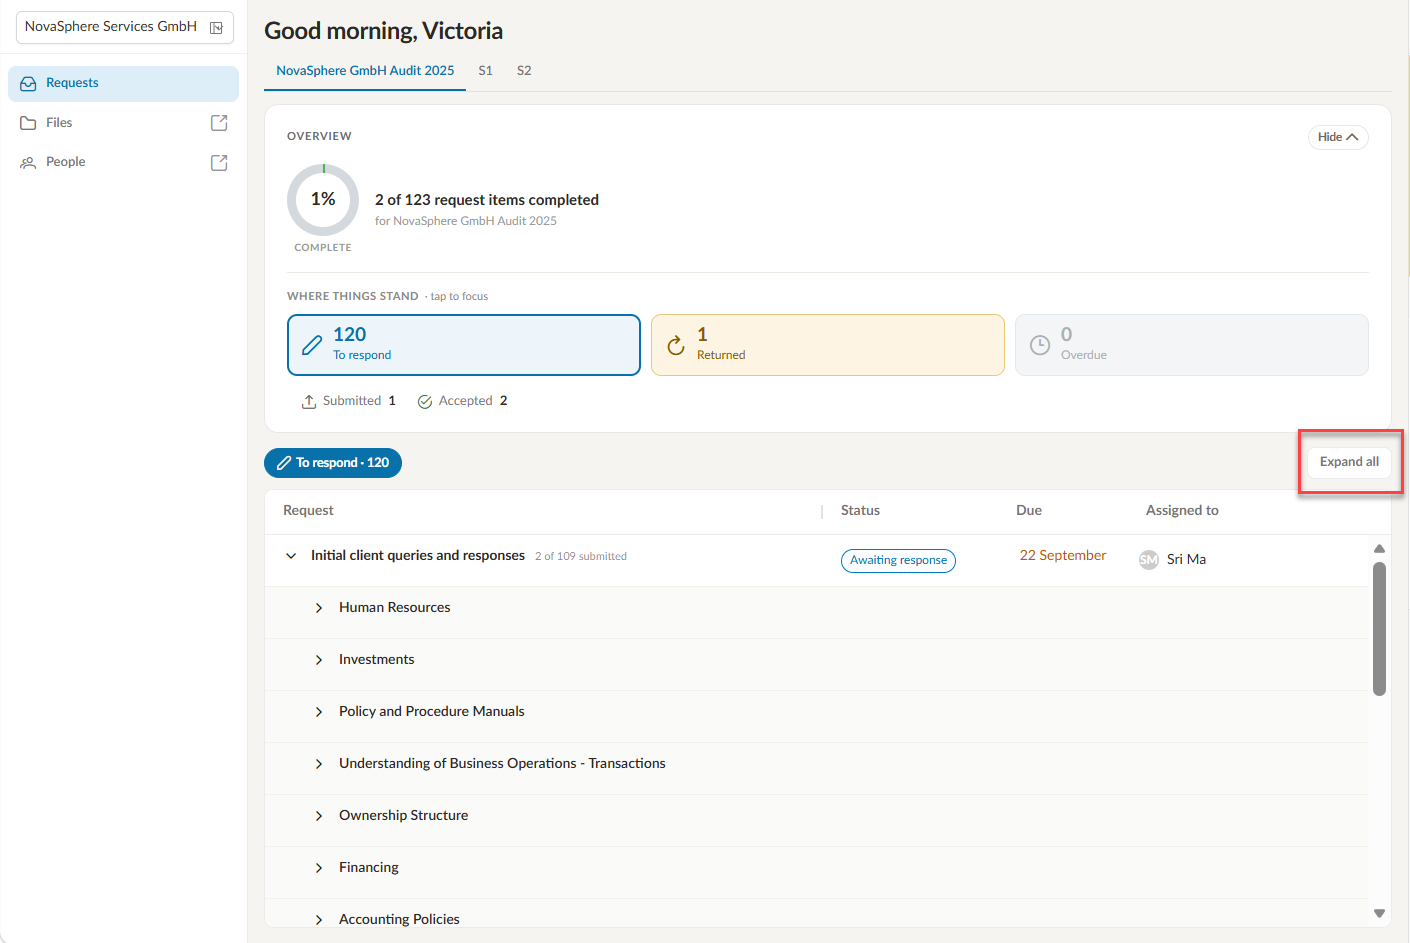
A request is made up of question sets, and each question set holds the individual request items your firm is asking for. You can expand a request to see its question sets and expand a question set to see the request items, each with its own status. Select Expand all to open everything at once.
If you only see part of a request
Your firm can assign individual request items to different people. If you are assigned a single item, you see only that item, its question set title and the request title. Someone else at your company may be handling the rest.
Due dates
A request has an overall due date, and individual request items can have earlier ones. A due date that has passed is highlighted, and overdue items are counted in WHERE THINGS STAND.
Files
The Files option in the left navigation menu opens the Files app in a separate portal.
The Files app allows you to:
-
Access the files your accounting firm has shared with you.
-
Upload files you want stored for your company that are relevant to your requests. Your firm's staff can access these files.
-
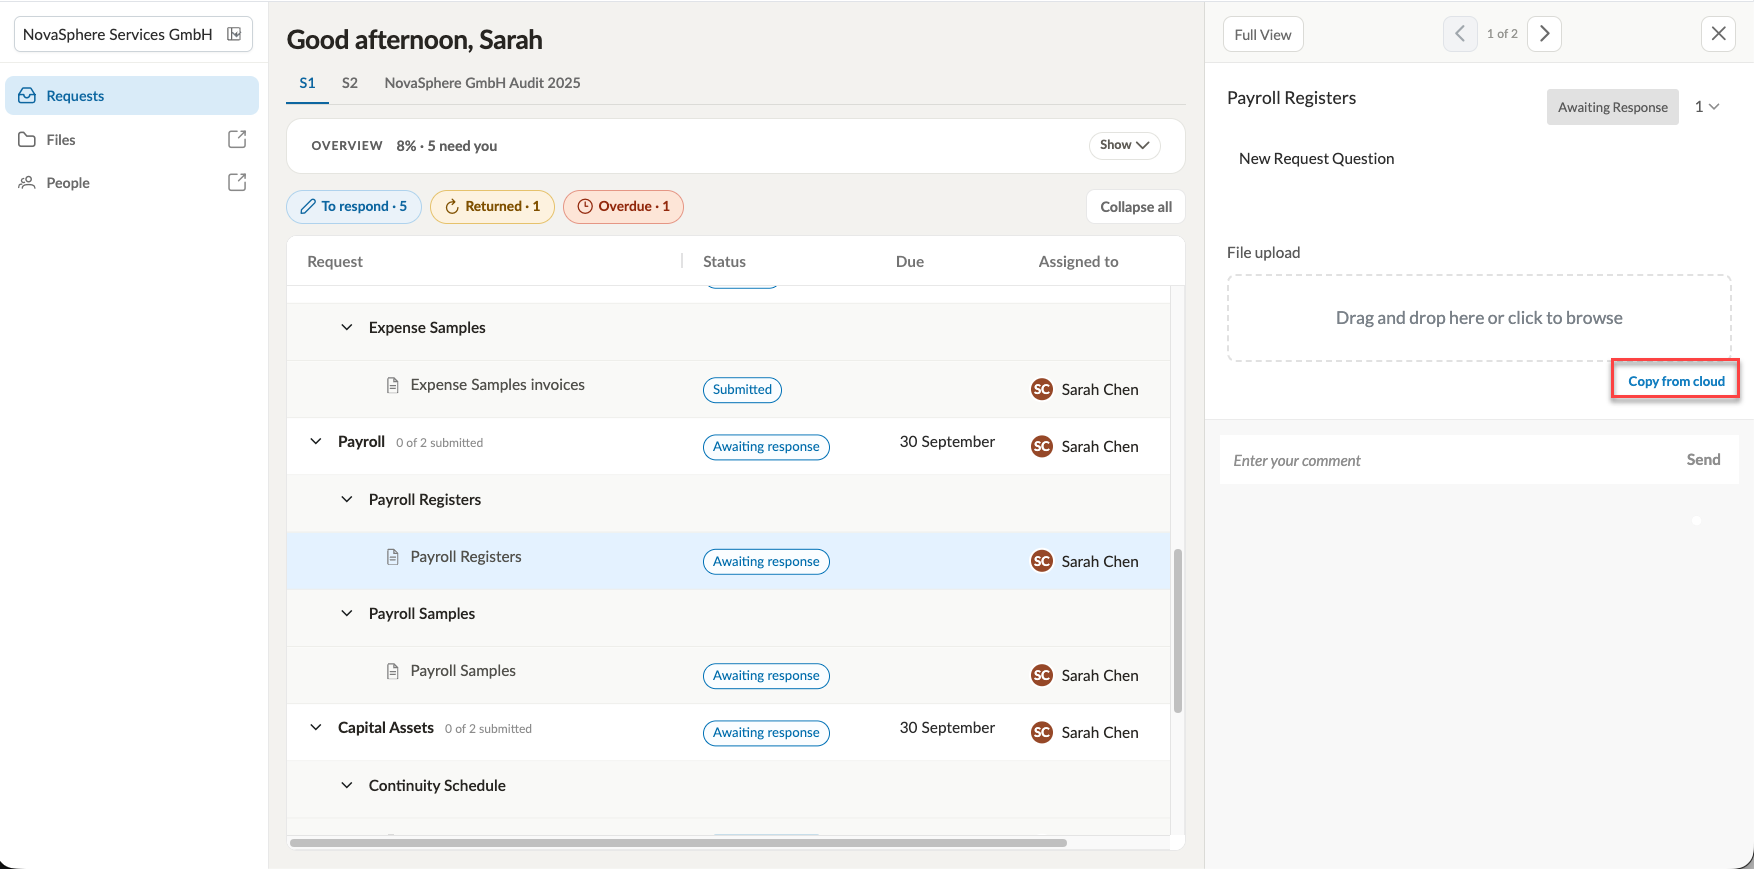
Link a file as a response to a request. When you respond to a request item, select Copy from cloud to use a file already in Files.
People
The People option in the left navigation menu opens the People page in a separate portal, where you can view active members from your firm who have access to the specific engagement.
Respond to a request
The panel for a request item shows what has been asked for, any instructions from the firm and how you are expected to respond. Depending on the item, you might be asked to upload a file, enter text, choose from a list, select a date or sign.
To respond to a request item:
-
Select the request item.
-
Read the instructions from the firm. You can select Full View to expand the request.
-
Respond to the request item. How you respond depends on what the firm has asked for:
-
File Upload - Drag your file onto the upload area or select the upload area to browse for the file. To use a file already stored with the firm, select Copy from cloud.
-
Text - Enter the requested information in the text box.
-
Picklist - Select one item from the drop-down menu.
-
Multi Picklist - Select one or more items from the drop-down menu.
-
Date - Select a date from the calendar.
-
Simple Electronic Signature - Choose whether to accept the document electronically or sign it manually.
-
-
Add a comment if needed, then select Send.
-
Select Submit Response.
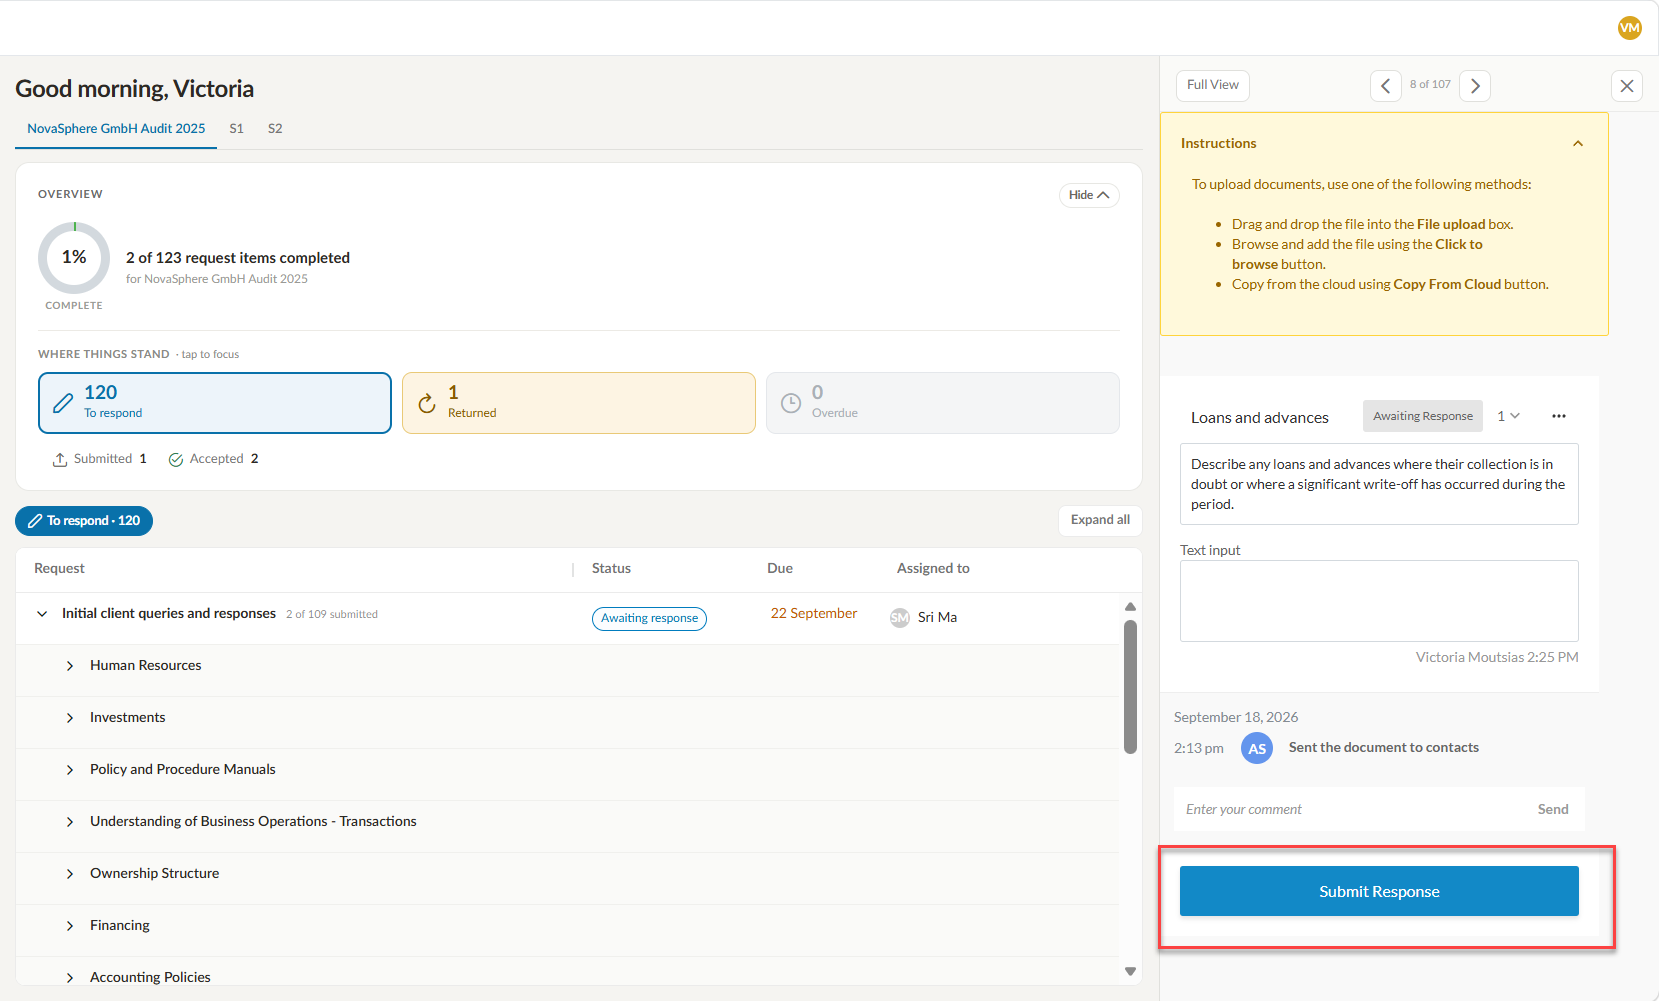
The request item is submitted and your accounting firm is notified.
Ask your accounting firm a question
If a request isn't clear, or you don't have what has been asked for, use the comment field on the request item. Enter your question and select Send. Your firm sees your comment alongside the item and can reply there, so the conversation stays with the request it belongs to.
Comments show the initials of whoever wrote them, along with the date and time.
Track your responses
Your accounting firm reviews each response and either accepts it or returns it to you.
Returned request items
If something different is needed, the request item is returned to you with a comment explaining what is required, and it appears under Returned in the portal. You can respond again by following the steps in Respond to a request.
Access to your requests
You can access your requests until the firm completes the engagement. Once the engagement is locked down, the requests are no longer available to you.
Password and account security
Change your password
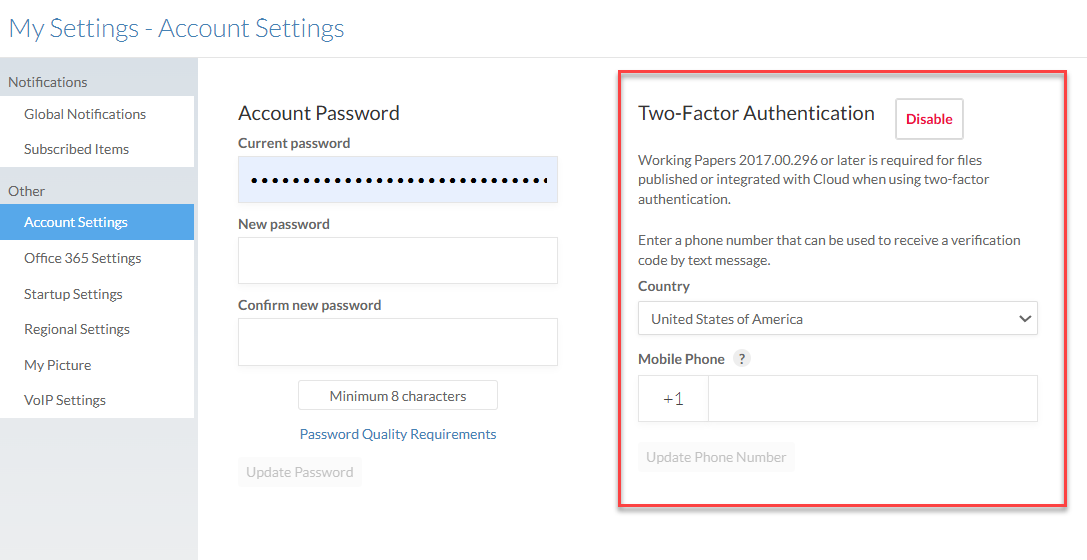
You can change your password at any time from your Account Settings.
To change your password:
-
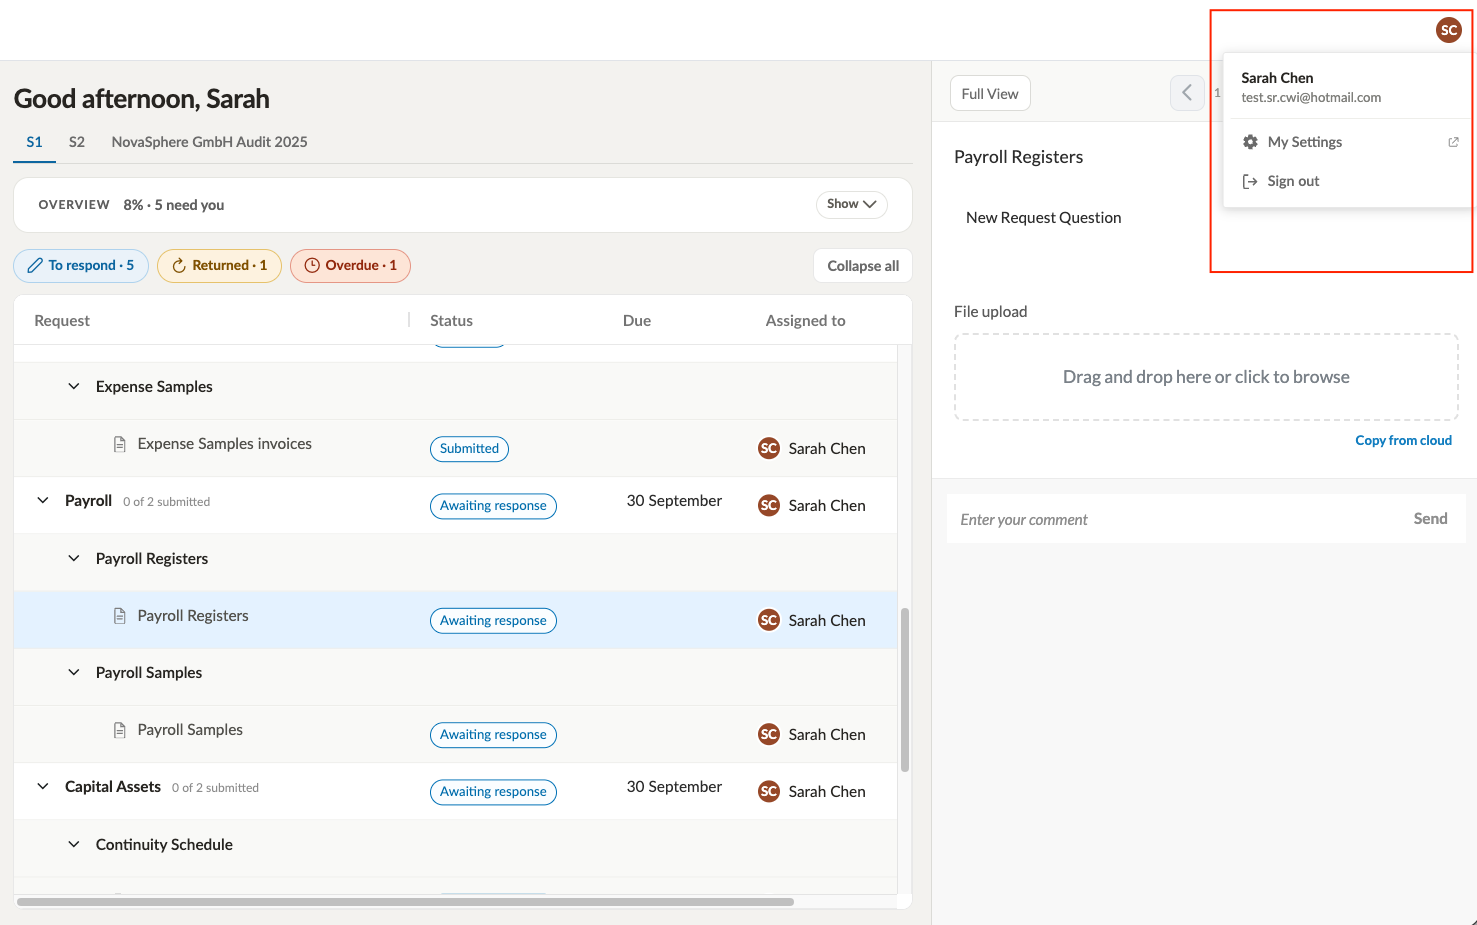
Select your initials in the top right corner, then select My Settings.
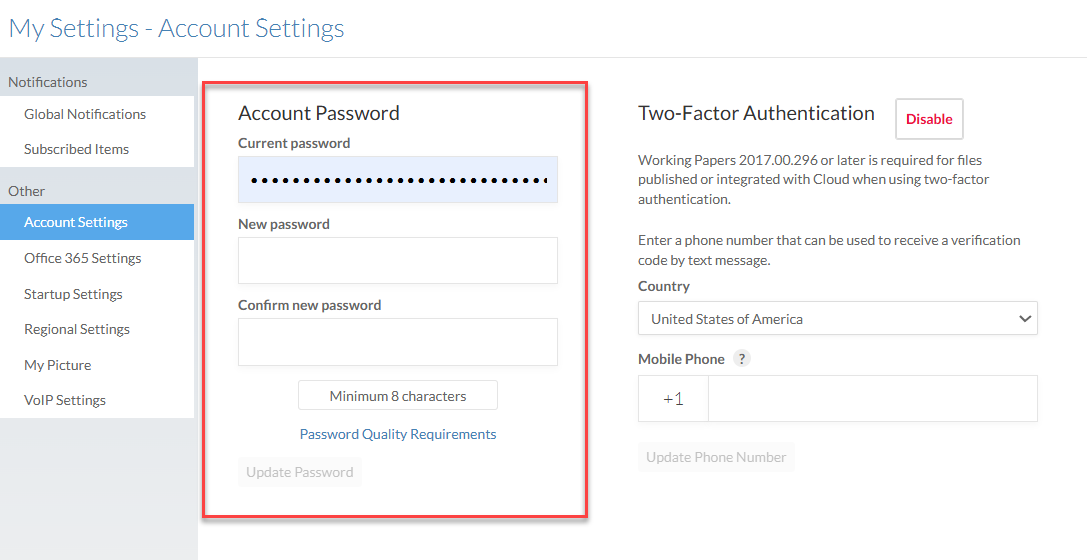
The Account Password section displays.
-
Enter your Current password.
-
Enter your New password, then enter it again in Confirm new password. Your password must be at least eight characters and can't be one of the last ten you used. Select Password Quality Requirements to see the full requirements.
-
Select Update Password.
Two-Factor Authentication
When you sign in, Two-Factor Authentication sends a verification code by text message to a phone number you provide.
To enable Two-Factor Authentication:
-
Select your initials in the top right corner, then select My Settings.
The Two-Factor Authentication section displays.
-
Select Enable, then select your country and enter your mobile phone number.
To turn off Two-Factor Authentication, select Disable.
Forgot your password
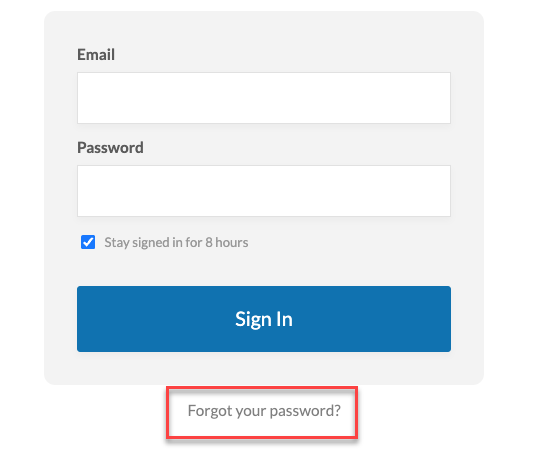
If you forget your password, you can request a reset from the Sign In page.
To reset your password:
-
On the Sign In page, select Forgot your password? The Request Password Reset form displays.
-
Enter your Email address.
-
Select Send Request.
You receive an email with a link to reset your password.