
Manage risks and risk assessments in an engagement
Risk management is a core feature within Caseware products for managing risks identified throughout an engagement. The Risk & controls page serves as the master repository for risk information. It provides a central place to identify risks, document the controls that address them and assess their effect on the engagement. From this page, you can:
-
View, add and edit all risks associated with the engagement, regardless of where they were identified.
-
Track risk details, such as descriptions, categories, likelihood, impact and responses.
-
Link risks to controls, procedures or other engagement elements.
-
Generate reports or summaries of all risks for review and compliance purposes.
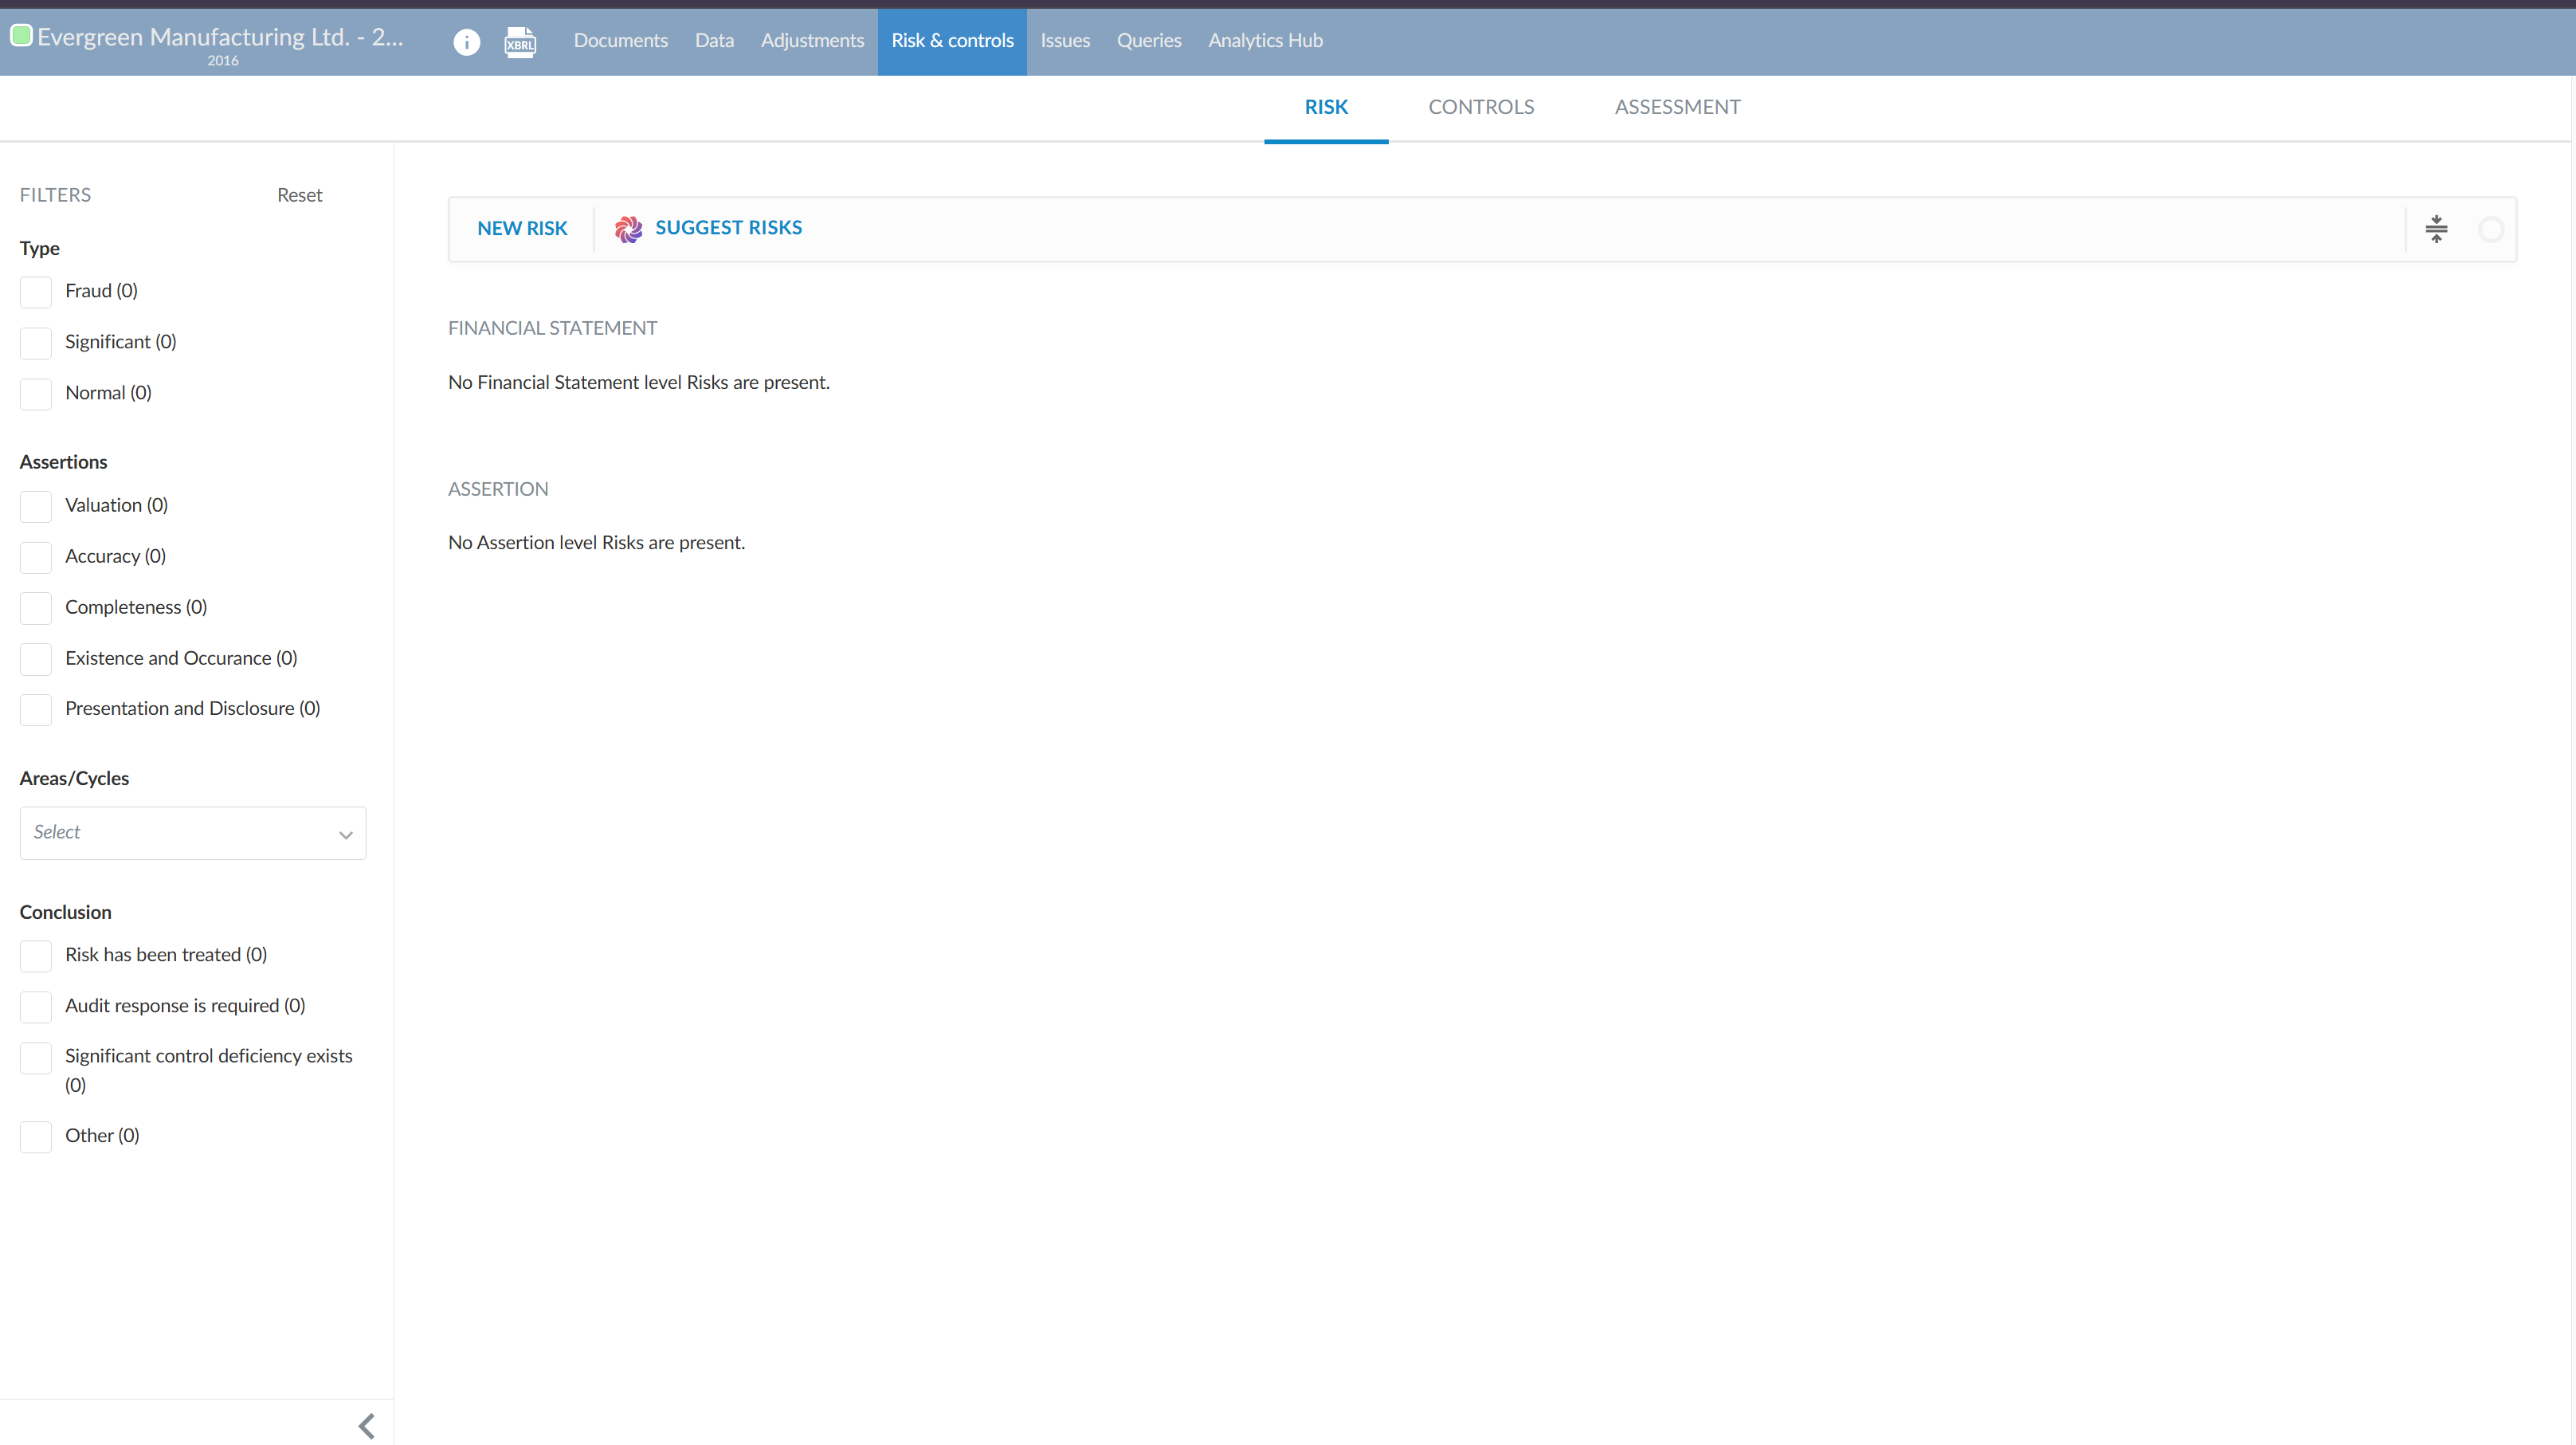
You can access this feature through the Risk page:
Add a risk
To add a risk to your engagement:
-
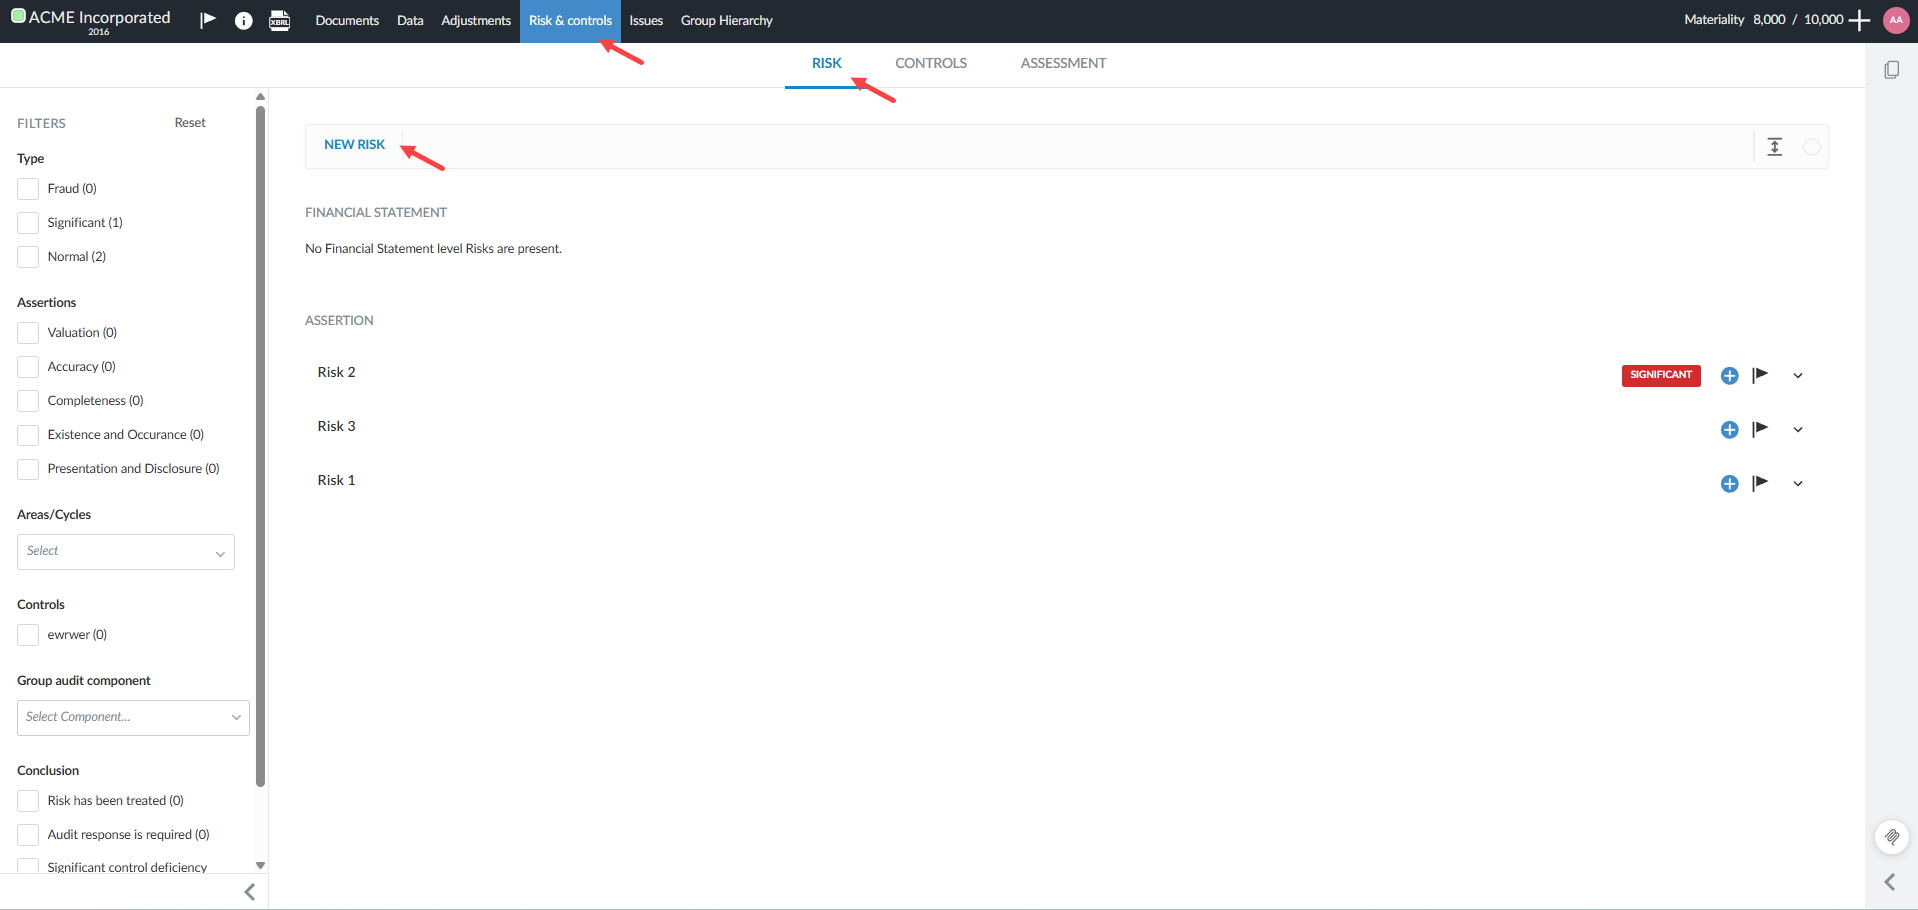
Select the Risk & Controls page in your engagement.
-
Select the New Risk button.
-
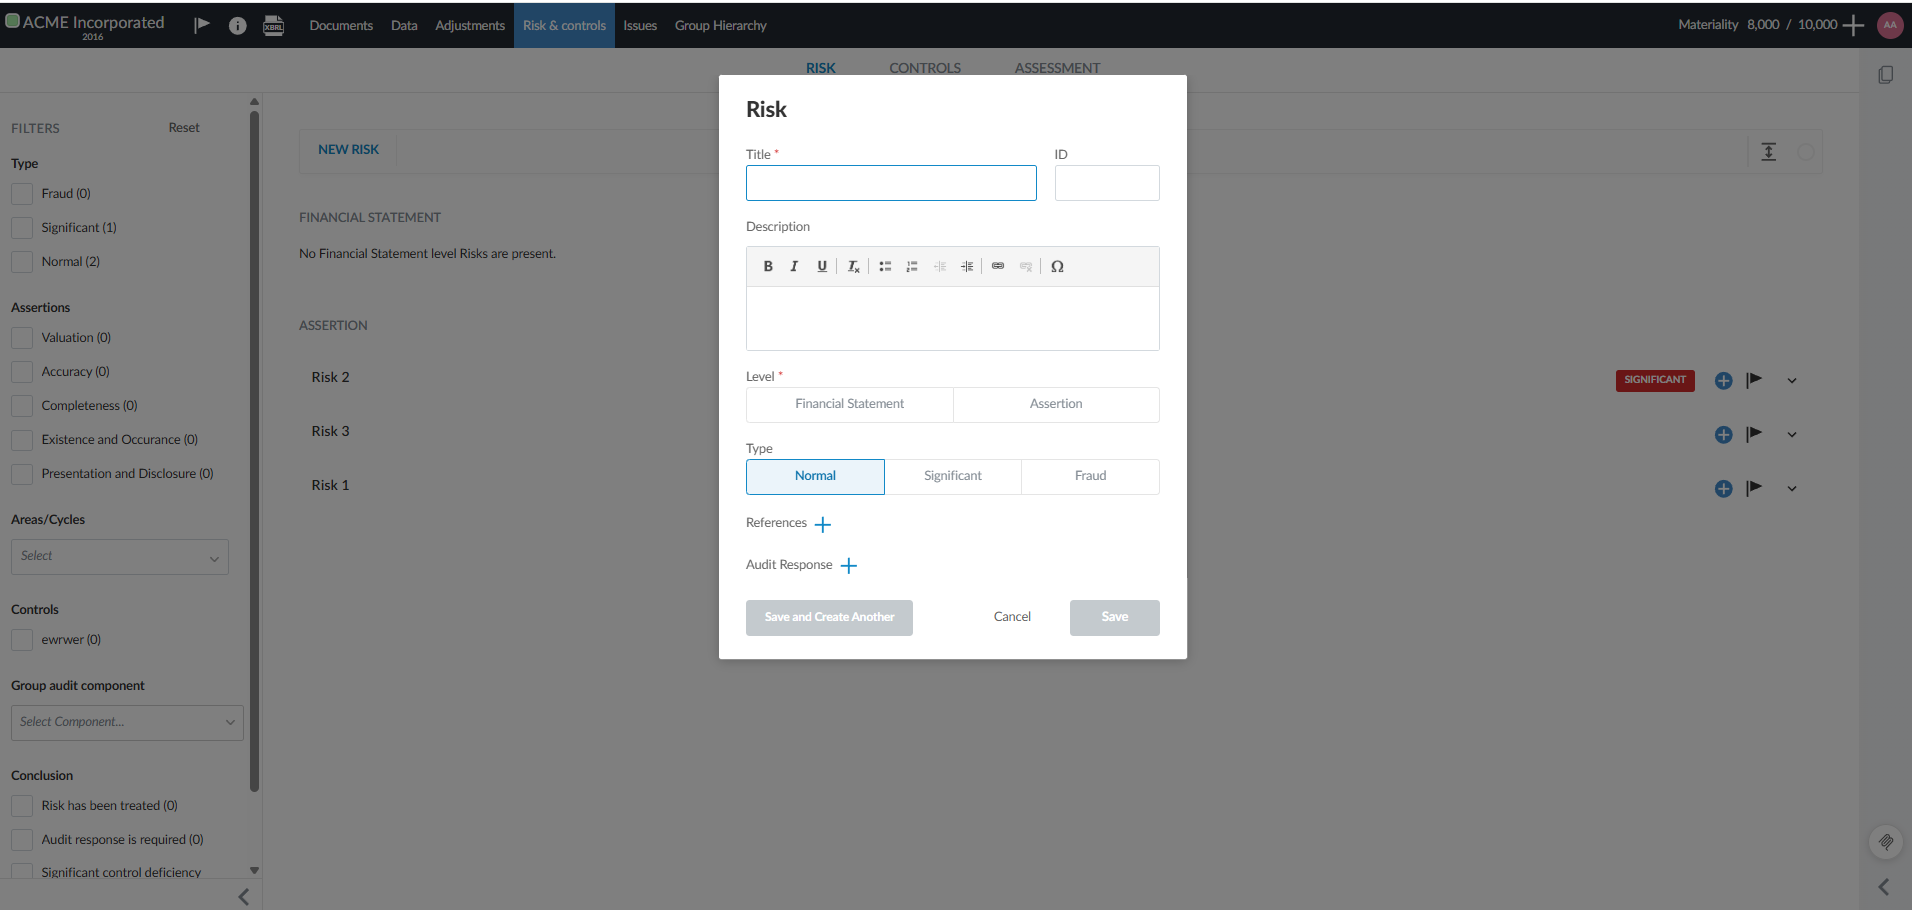
Complete the risk details.
-
Select Save or Save and Create Another.
Notes:
-
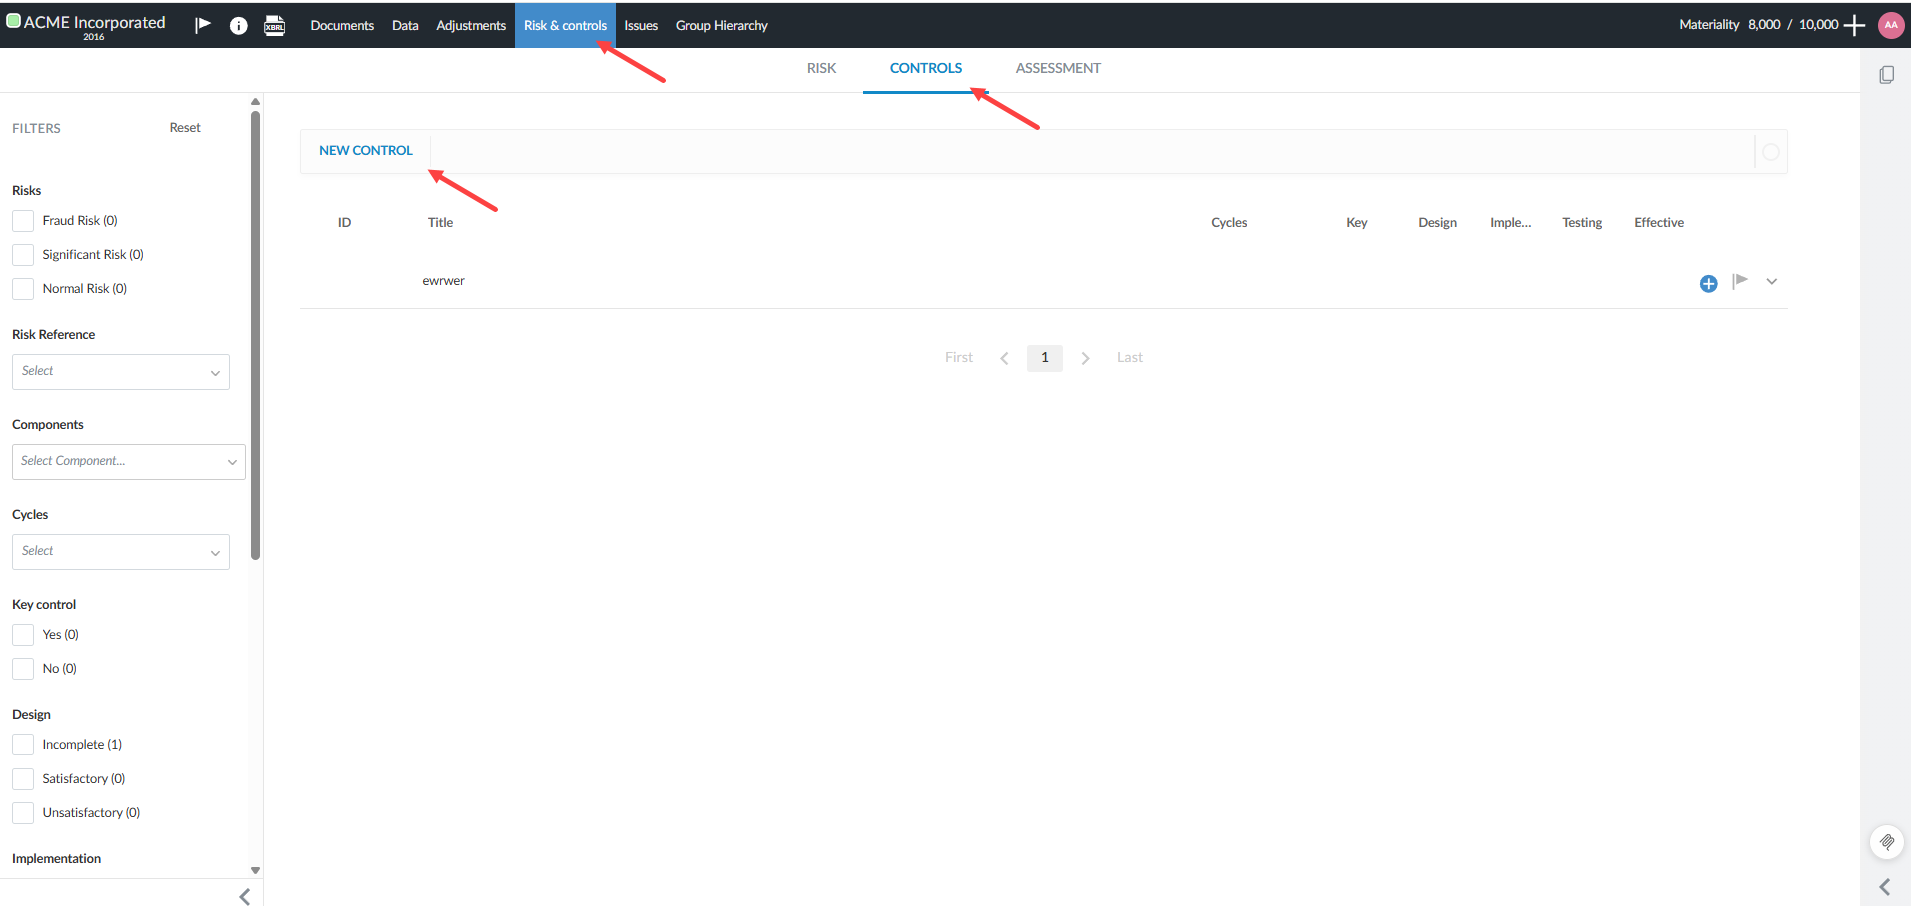
You can also add Controls to your risk assessment in a similar way. Controls are procedures or activities designed to mitigate identified risks in your Caseware Cloud engagement.
-
You can ask Caseware Verity to propose risks for you using evidence in your engagement. See Use the Risk Suggestion Agent for more information.
Risks:
Controls:
Perform a risk assessment
When you perform a risk assessment, you evaluate the engagement's risks to determine their significance and action items.
-
You rate the risk (for example, as high, medium or low) based on likelihood and impact.
-
You may assess inherent risk, control risk and risk of material misstatement.
-
You document your planned response or actions to address the risk.
-
You may add comments, issues or sign off on your assessment.
The Assessment tab is available in the Risk & Controls page:
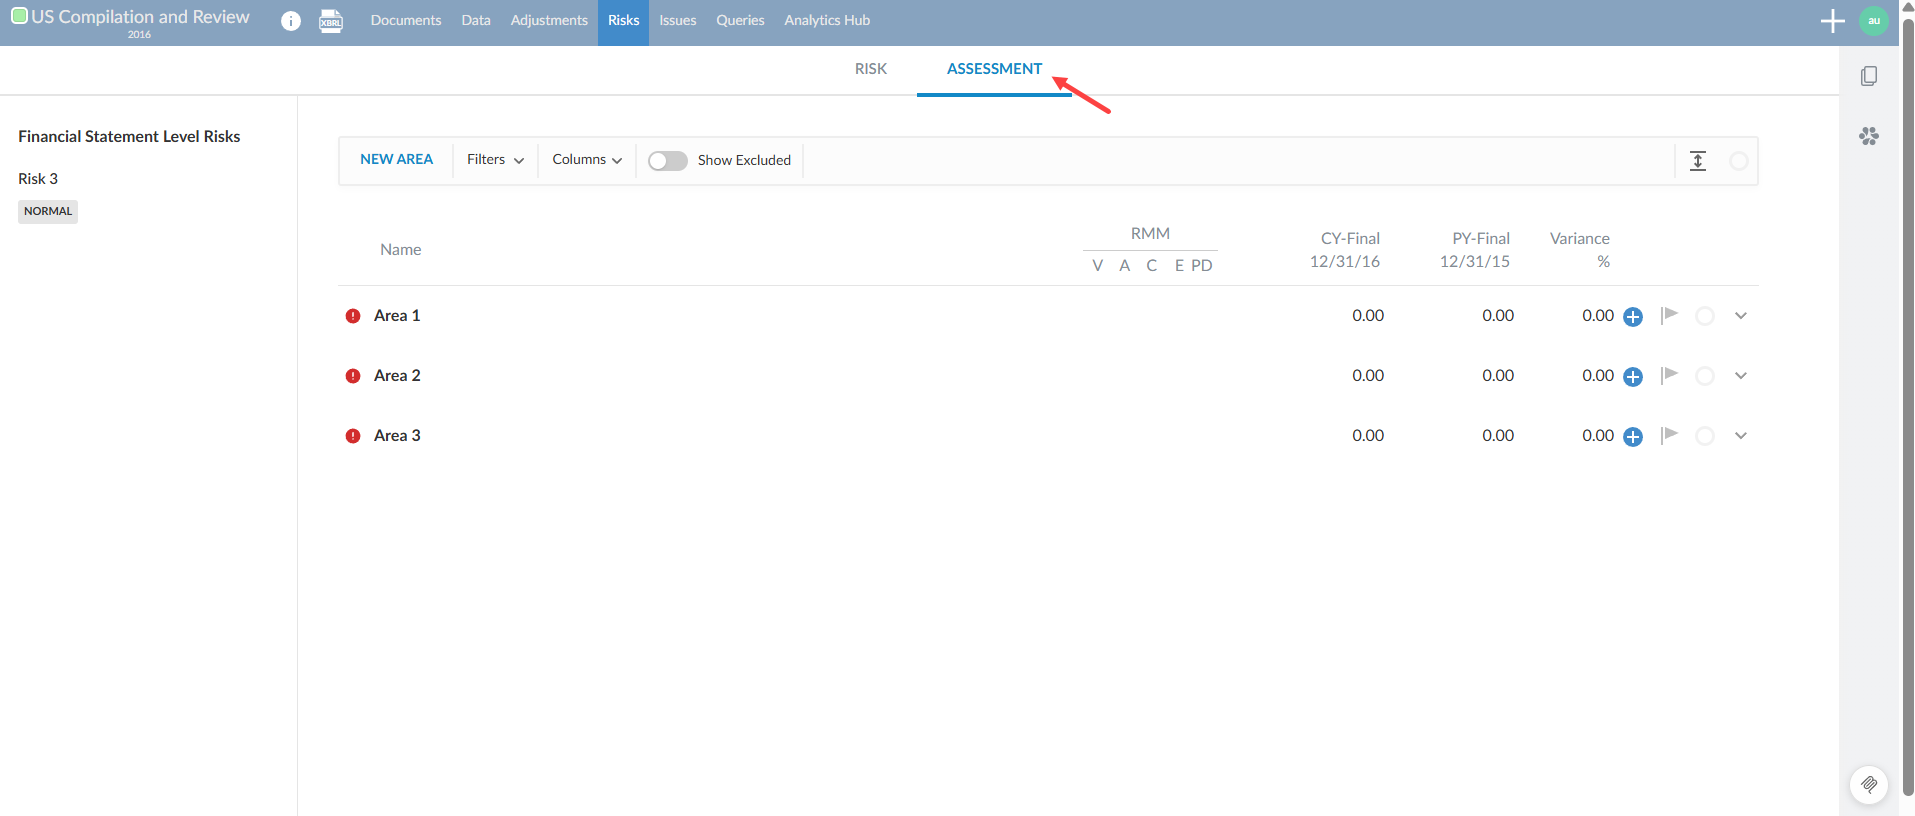
Filter risk assessments by cycle
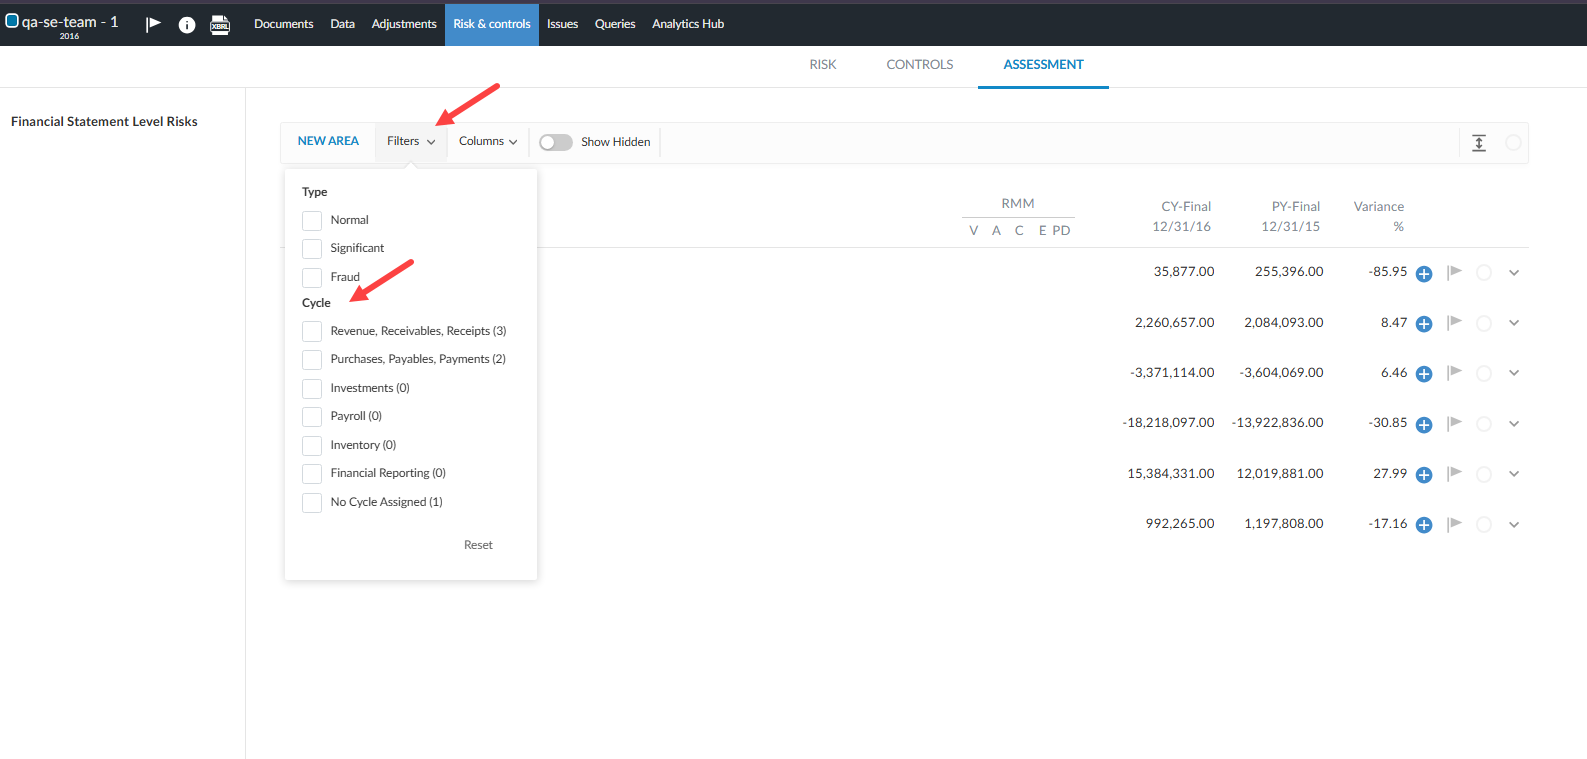
When performing risk assessments by area, you can filter the Assessment tab by cycle. The filter displays areas assigned to the selected cycles.
To filter risk assessments by cycle:
-
Open the Assessment tab on the Risk & Controls page.
-
Ensure the assessment is grouped by Area.
-
Select the Filters drop-down menu.
-
Under Cycle, select one or more cycles to display the areas assigned to those cycles.
-
To display areas without an assigned cycle, select the cycle-less areas option.
-
Flag overridden risk levels
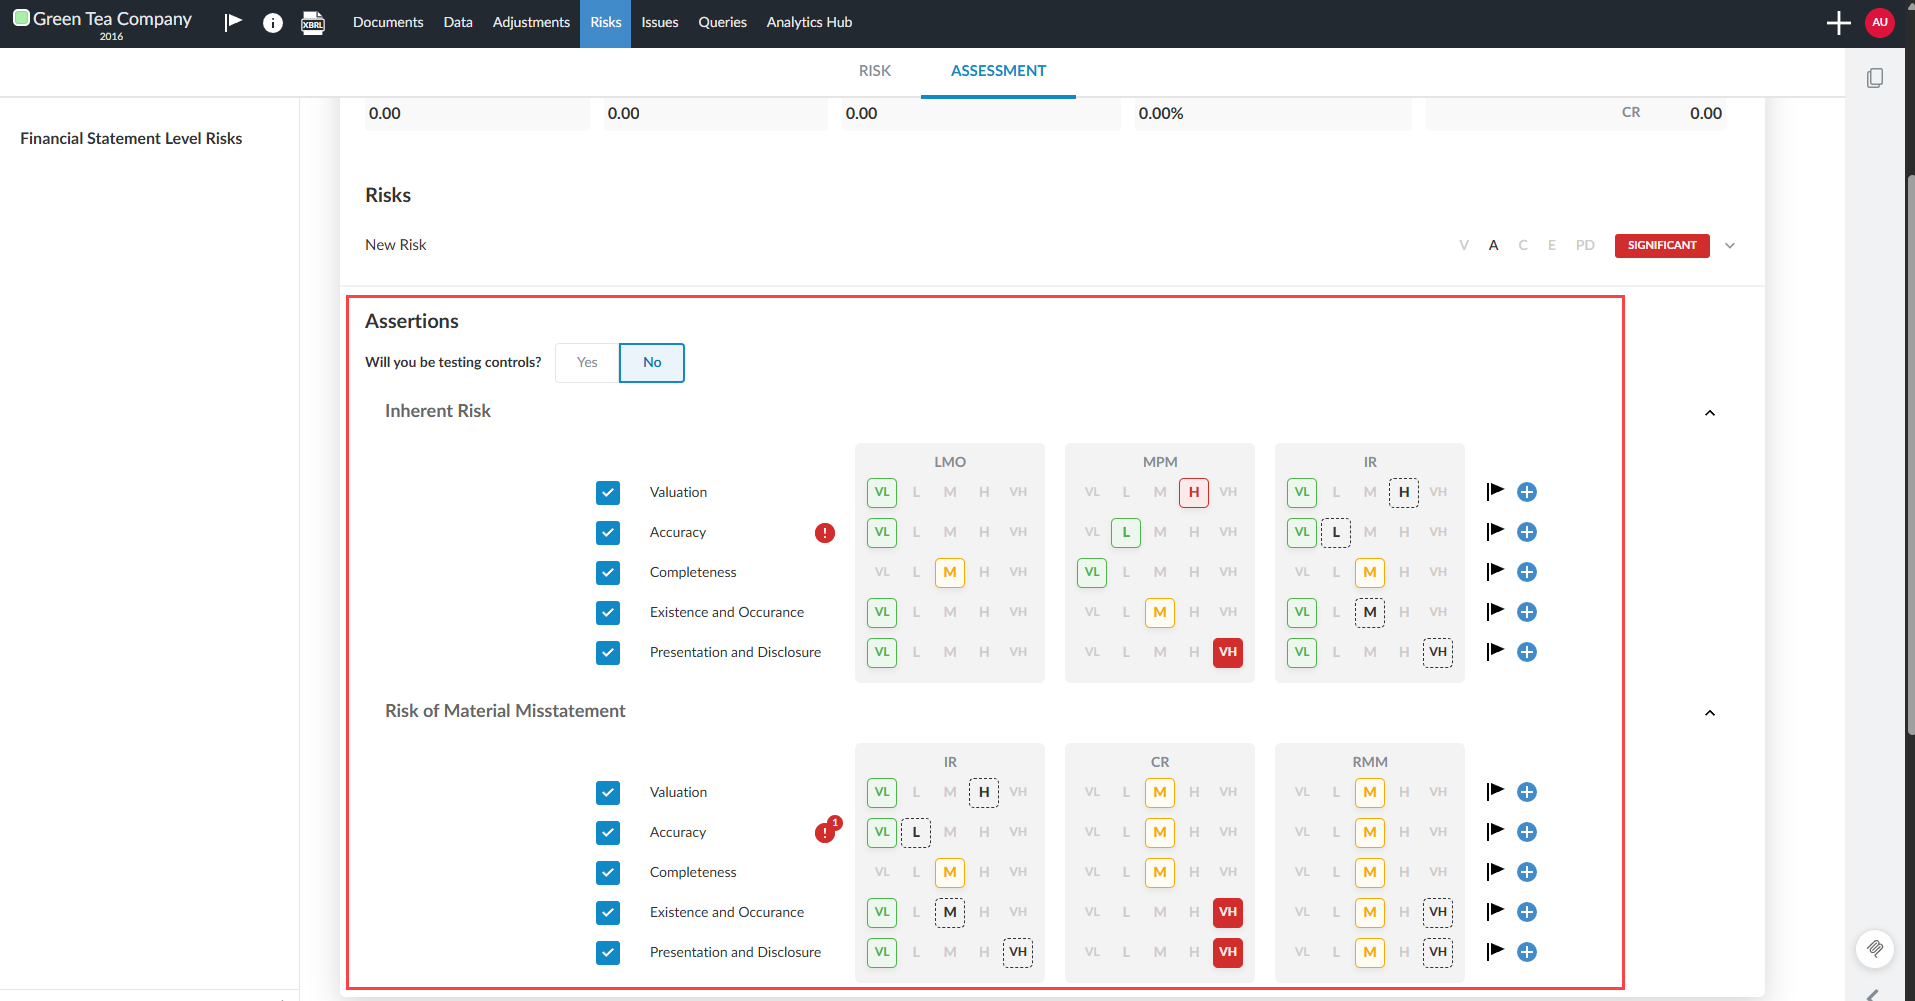
You can flag when a user manually overrides a default calculated risk level at the Inherent Risk (IR) and Risk of Material Misstatement (RMM) assertion level.
If a user manually overrides a calculated inherent risk (IR) or risk of material misstatement (RMM) level, the original default risk level is visually indicated with a dotted outline in the assessment card. This makes it clear that the assessed level differs from the calculated default and helps reviewers identify where professional judgment has been applied.
Users can add issues or annotations at the assertion level to document explanations or follow-up items related to overridden risk levels.
This feature must be enabled by a Caseware or enterprise author in the template Product Settings | Assessment settings by toggling on the Show assessment controls setting.
Default risk styles highlighted by a dotted line border:
View financial grouping balances on the Assessment tab
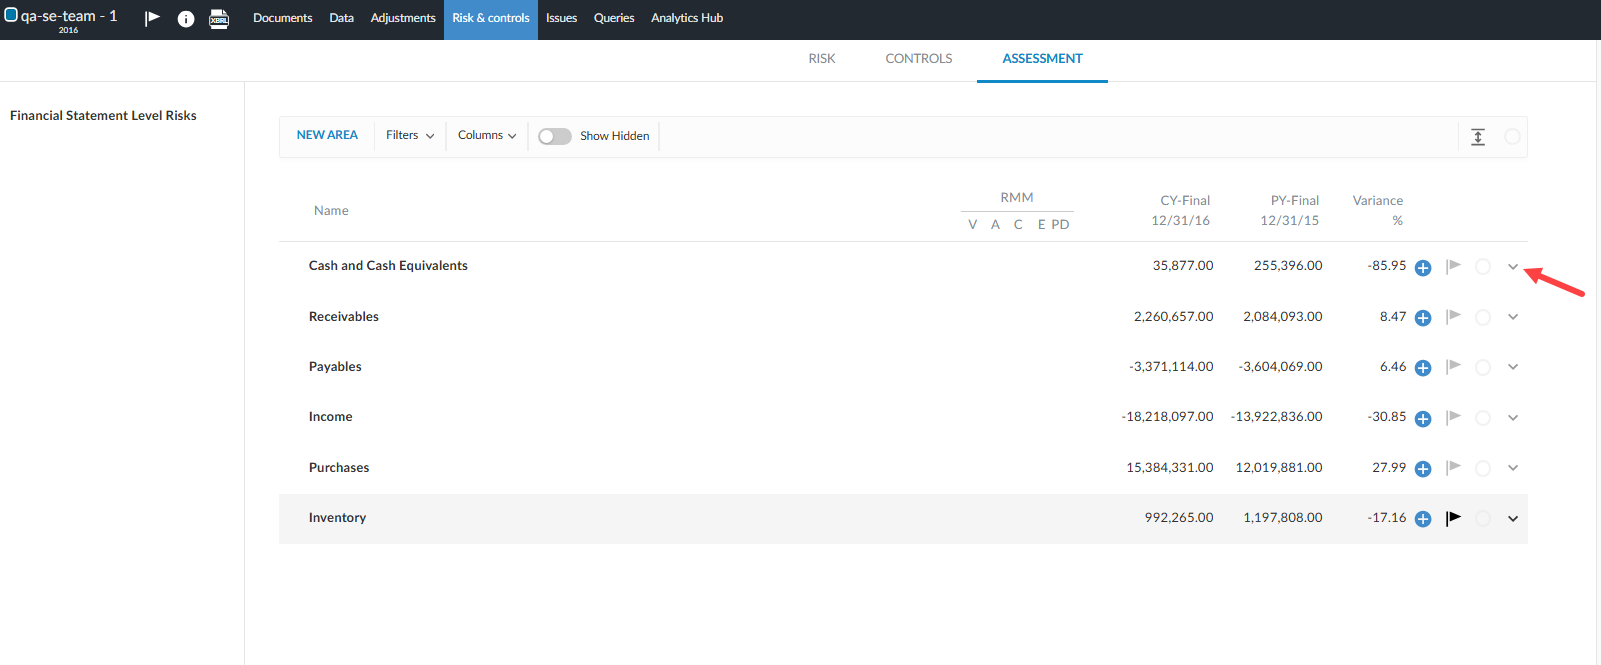
You can view a breakdown of the accounts and financial groupings that make up a financial statement area balance directly on the Assessment tab. The breakdown includes current-year and prior-year balances and calculated variances.
Before you begin
Ensure that:
-
Trial balance data has been imported into the engagement.
-
Financial statement areas have assigned accounts/groupings with both current year (CY) and prior year (PY) balance data available.
To view account balances for a financial statement area:
-
Go to the Risk & controls page and select the Assessment tab.
-
Locate the financial statement area row you want to review.
-
At the far right of the row, select the expand arrow (˅).
-
The row expands inline to display the Accounts breakdown.
-
Review the individual accounts and groupings that make up the area balance, including CY-Final, PY-Final and variance values.
-
Select the collapse arrow (˄) at the far right of the row to close the breakdown.
Add issues and annotations for each assertion row in risk assessments
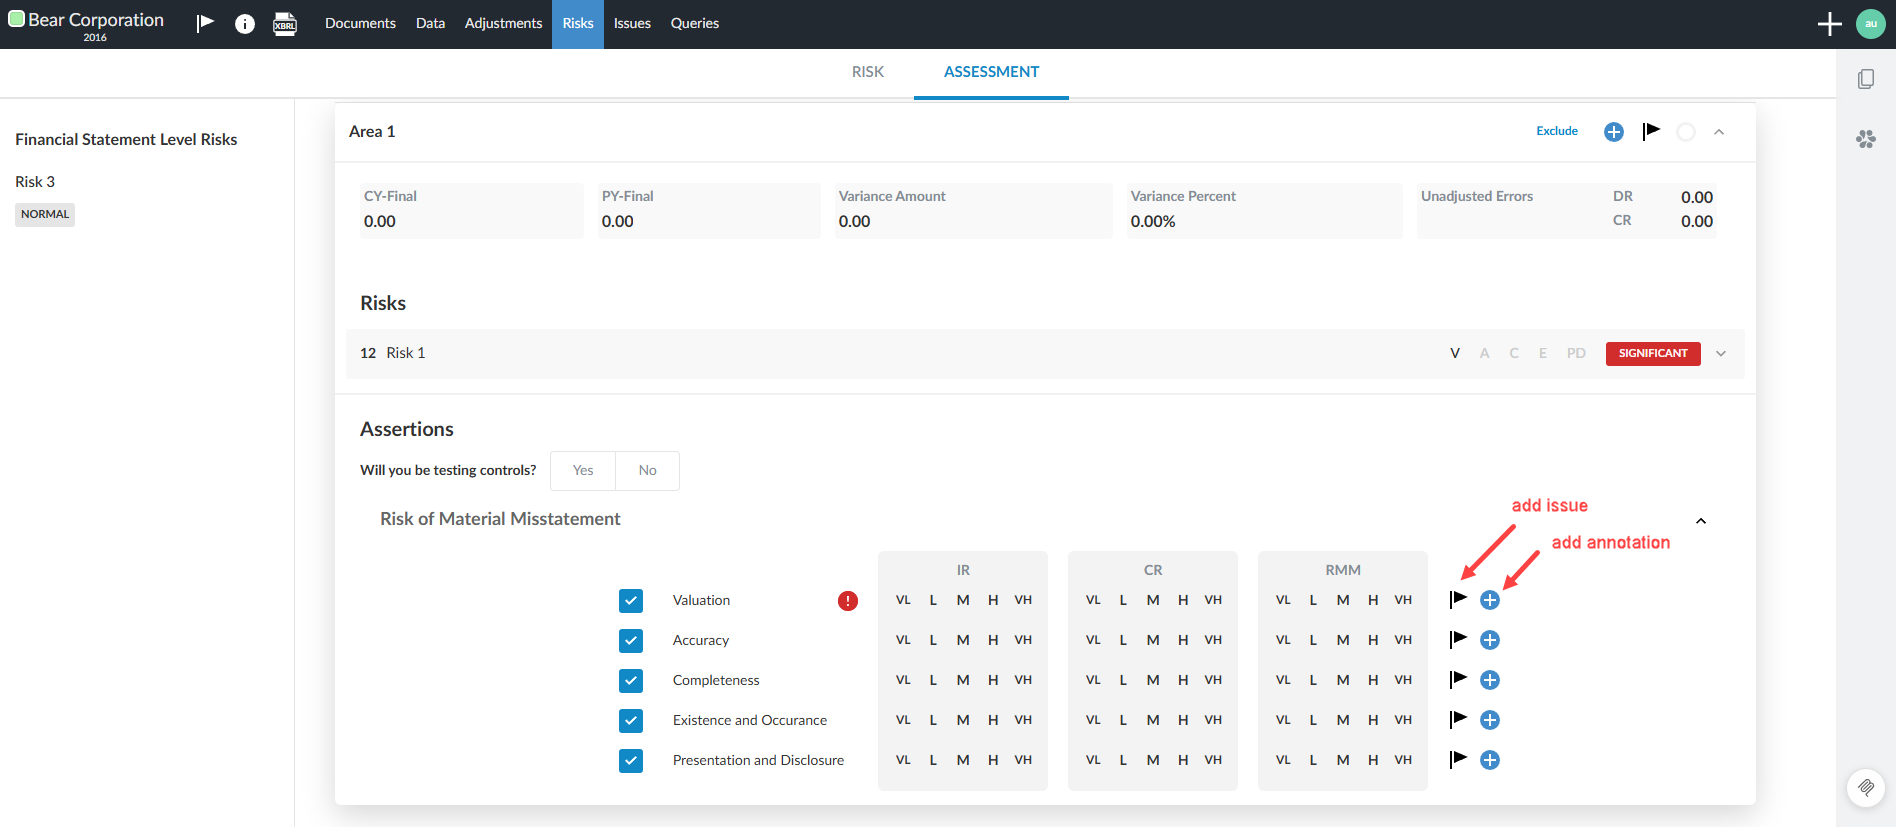
You can now add issues and annotations directly to each assertion row in your risk assessment cards. This allows for more granular documentation and tracking of risks, considerations and notes at the assertion level. Annotations and issues are clearly associated with the relevant section (IR or RMM), improving clarity and auditability.
To create issues and annotations for each assertion row:
-
Open the Assessment tab in the Risk & Controls page of an engagement.
-
Select the Add icon [
 ] beside an assertion row to add an annotation. The annotation expands to the left.
 -
Select the Issue icon [
 ] beside an assertion row to add an issue.
The system saves each annotation or issue with a property that determines its display location (IR section or RMM section).
Control visibility on the Assessment tab
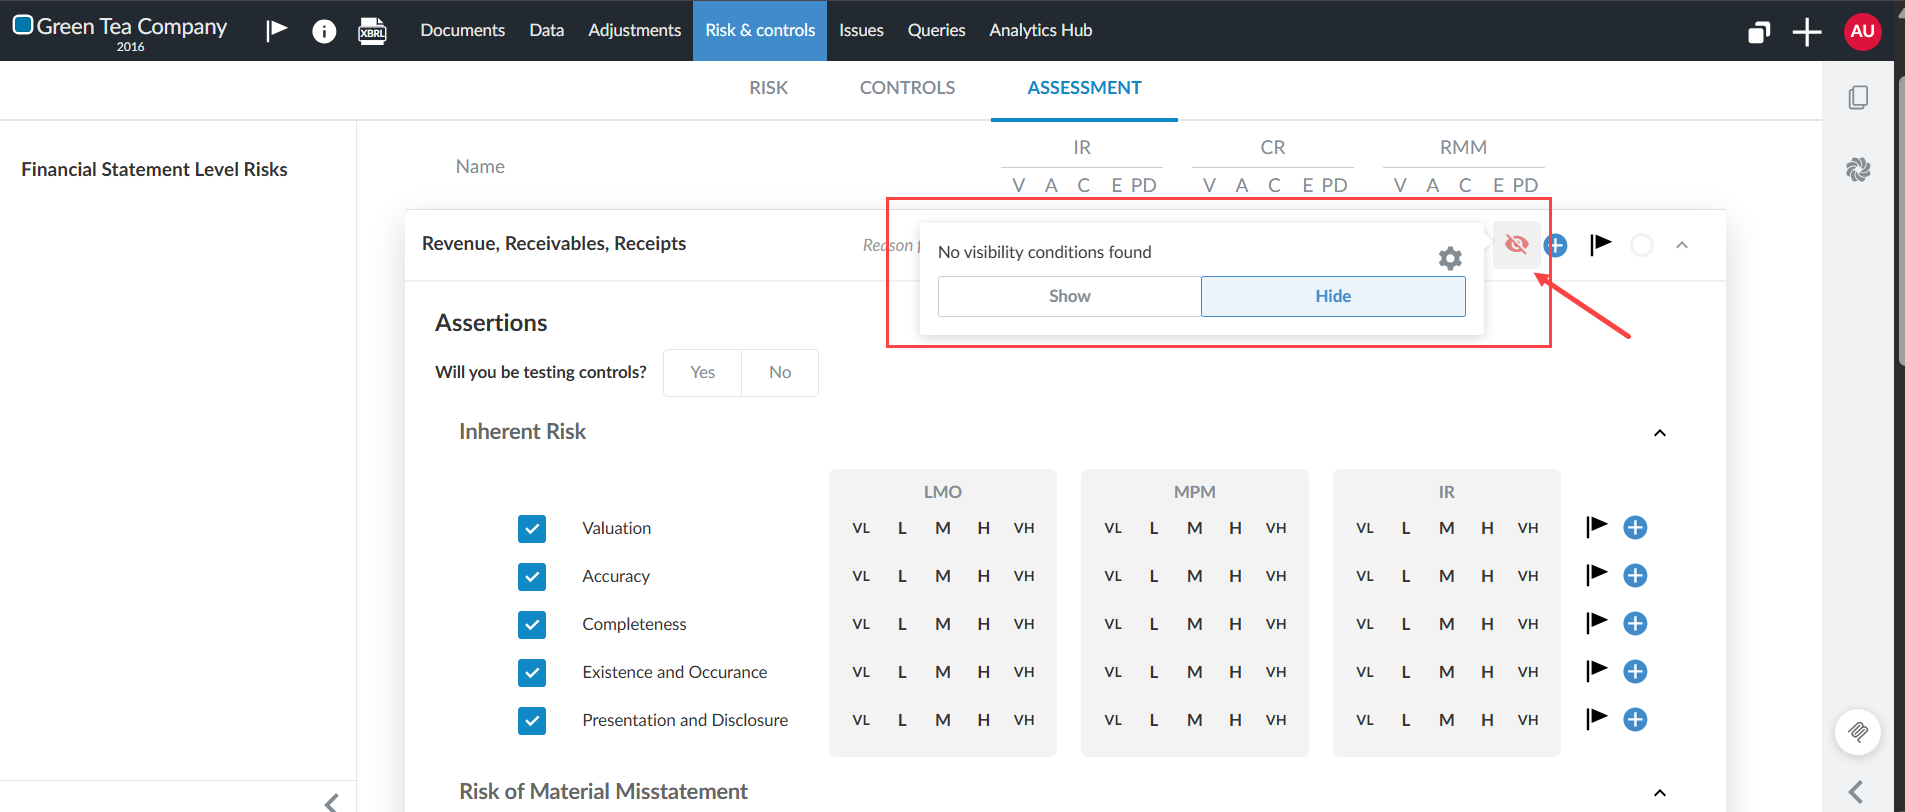
You can apply visibility conditions to individual areas, cycles and risks on the Assessment tab of the Risk & Controls page. This replaces the previous exclusion system with the same visibility framework used elsewhere in the engagement. To learn more about how visibility conditions work, see What are visibility settings?
Visibility conditions on the Assessment tab:
-
Carry forward during roll forward
-
Are included in template updates
-
Appear in the visibility conditions export
Areas, cycles or risks that were previously excluded are now hidden. These items are labeled as Hidden. Existing exclusion reasons are preserved in the Reason for hiding field.
To hide an area, cycle or risk:
-
Open the Assessment tab in the Risk & Controls page.
-
Select the area, cycle or risk you want to hide.
-
Select the Visibility icon [
 ] to hide the item.
 -
To record why, enter a reason in Reason for hiding.
To view hidden items and their reasons, enable Show hidden.
Signoff options
Depending on how your product is configured, risk reports can be signed off in 3 ways:
-
Sign off the entire report: One signoff button is available in the report for you to sign off the entire report.
-
Sign off each risk in the report: A signoff button is available in each risk card in the report. You can sign off each risk individually.
-
Custom signoff: In some cases, your product may have custom signoff procedures configured for your product.
Author and template configuration
This section documents procedures for enabling features related to risks and risk assessment to your templates.
Assign cycles to areas
Firm and enterprise authors can assign business cycles to areas to organize engagement risk workflows.
To assign a cycle to an area:
-
In product or engagement settings, navigate to Areas.
-
From the Cycle drop-down menu for an area, select the corresponding cycle.
-
Select Save.
Risk | Assessment
To enable balance breakdown for a financial statement area:
-
Open your product template.
-
Select Information [
 ].
]. -
Select Settings.
-
Select Risk | Assessment.
-
Turn on Show financial group breakdown.
-
Return to the Manage template page
-
Save, and Publish the template.
Scale options
As authors, you can define the rating systems used to assess and score risks. As a user, you can use the rating system to evaluate the likelihood, impact or other attributes of a risk.
Purpose of scales:
-
Ensures that all risks are assessed using the same criteria and rating system across the firm.
-
Provides clear definitions for each level of the scale, such as Low, Medium and High, to guide user judgment.
-
Adapts the risk assessment process to your firm's risk appetite, regulatory environment or industry standards by defining custom scales.
Example scales:
-
Likelihood: Rare, Unlikely, Possible, Likely, Almost Certain
-
Impact: Insignificant, Minor, Moderate, Major, Catastrophic
-
Overall Risk: Low, Medium, High
Export visibility conditions
Firm and enterprise authors can export the visibility conditions applied across the engagement, including those on the Assessment tab.
To export visibility conditions:
-
Select the Information icon [
 ] in your product template
 -
Select Export visibility conditions. The conditions download onto your device as a CSV file.
Related topic
-
To learn more about risk and controls, see Navigate the Risk & controls page.