Use Disclosure Checklist Agent
Disclosure Checklist Agent reads your client's financial statement and drafts answers to your disclosure checklist questions, with citations to the supporting passages in the document. You review each suggestion, verify the evidence, and approve or change the answer. See What is Disclosure Checklist Agent? for an overview of the feature.
Before you begin
Before running the automation, confirm the following:
-
You have a finalized PDF of your client's financial statement and the PDF is available in the Documents page of your engagement. The automation reads from the PDF you select. The automation assembles a list of all the PDFs in the engagement for you to select from. Ensure the PDF you select reflects the final, agreed version before running.
-
Your disclosure checklist is configured in the engagement and visible. The automation works against the disclosure checklist already set up in your engagement. Ensure the disclosure checklist optimizers have been completed so that the disclosure checklists are visible before running.
Run the automation
To run Disclosure Checklist Agent:
-
Open your engagement.
-
Navigate to a disclosure checklist in your engagement.
-
Select the Verity (
 ) icon in the top right to open the Verity panel.
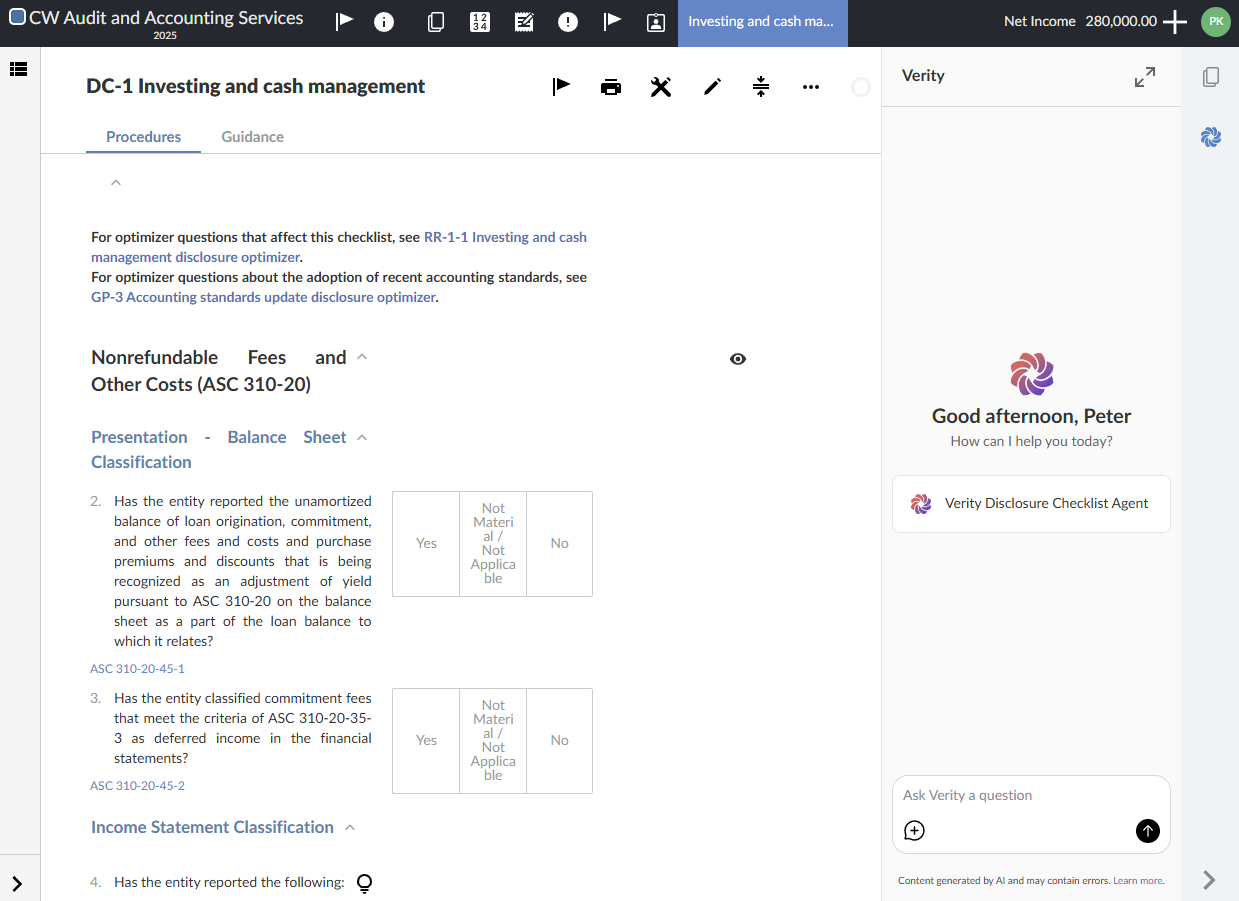
-
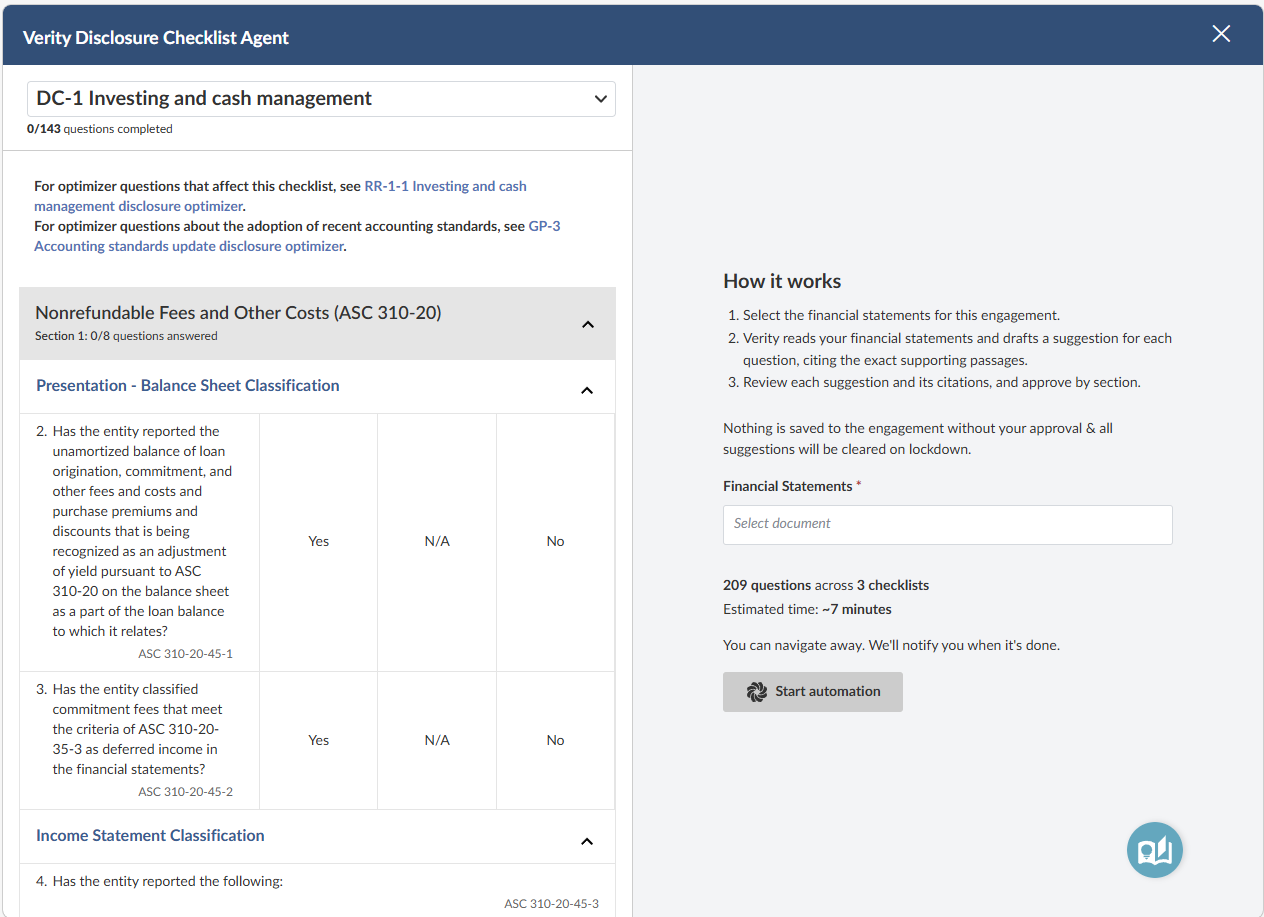
Select Verity Disclosure Checklist Agent. The Disclosure Checklist Automation view opens in full screen.
-
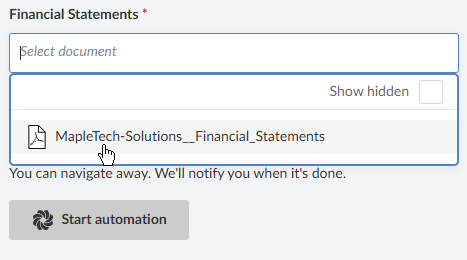
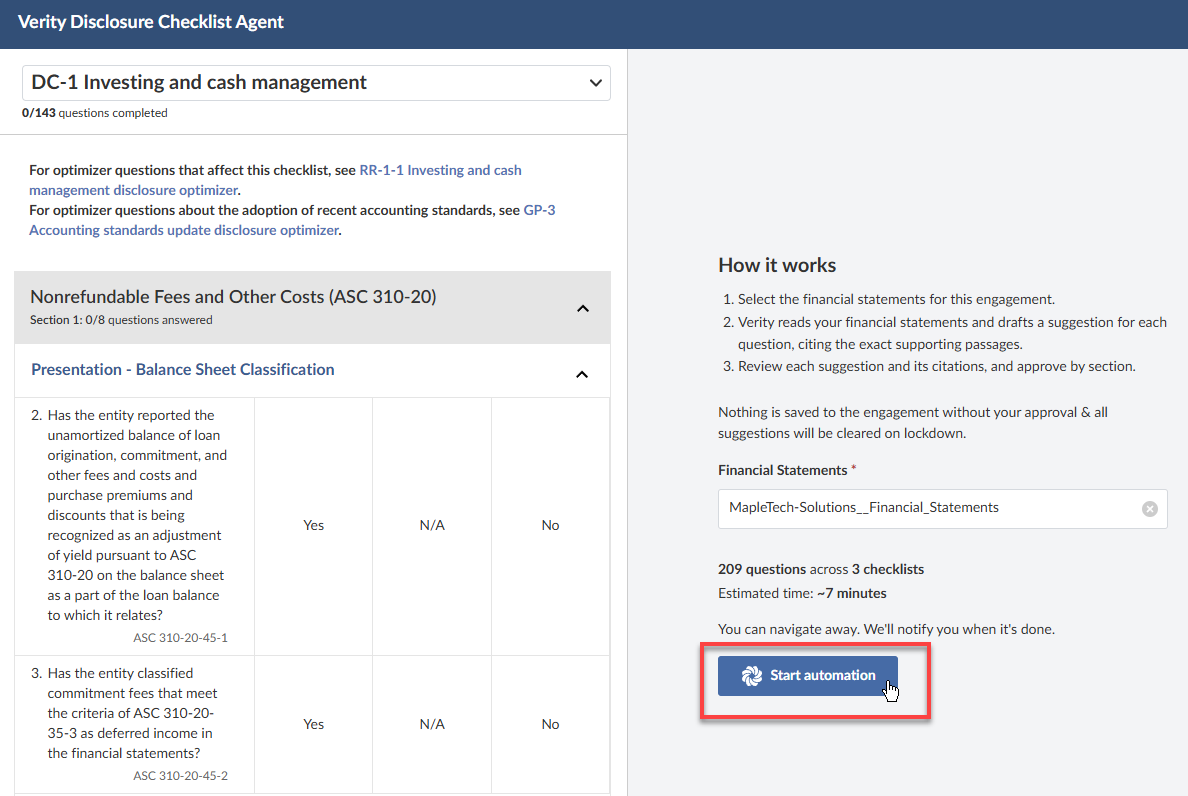
In the Financial Statements dropdown, select the PDF financial statement you want to run the automation against. PDF documents already uploaded to your engagement are listed.
-
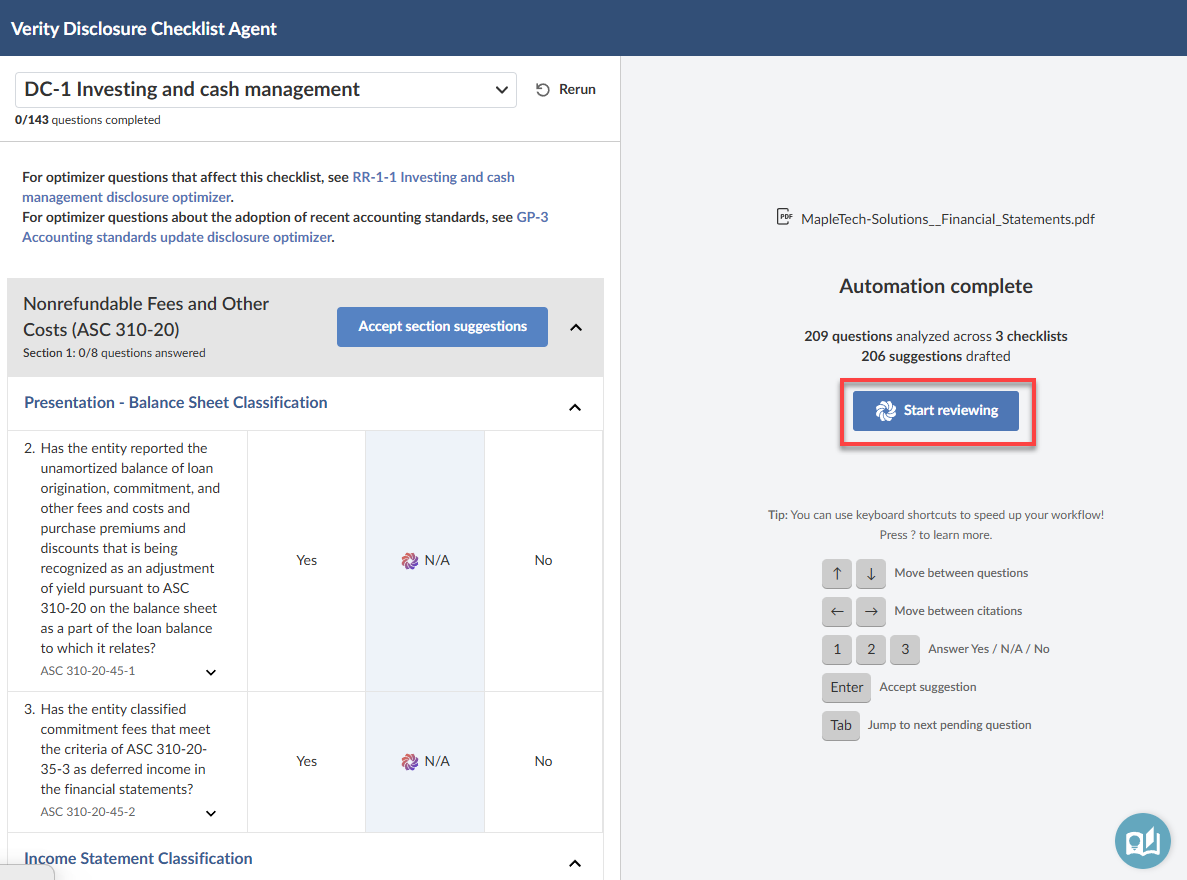
Select Start Automation. The automation begins processing. A progress indicator shows that the Disclosure Review agent is working through the checklist.
-
Wait for processing to complete. When the automation finishes, the right panel shows an Automation complete summary with the number of questions analyzed and suggestions drafted.
-
Select Start reviewing to begin your review of the Disclosure Review agent's suggestions. The document panel on the right shows the financial statement PDF.
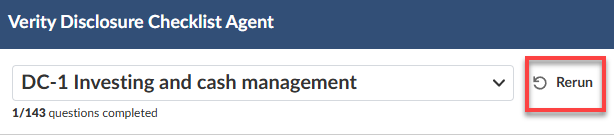
You can run the automation up to three times per engagement. Select the Rerun icon to do so.
If your financial statement changes after you run the automation, select the updated PDF and run again.
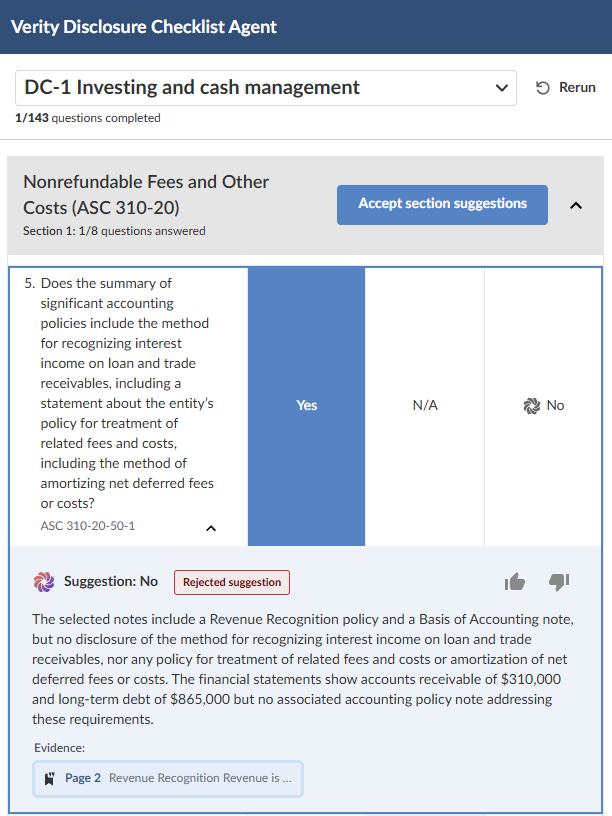
Review suggestions
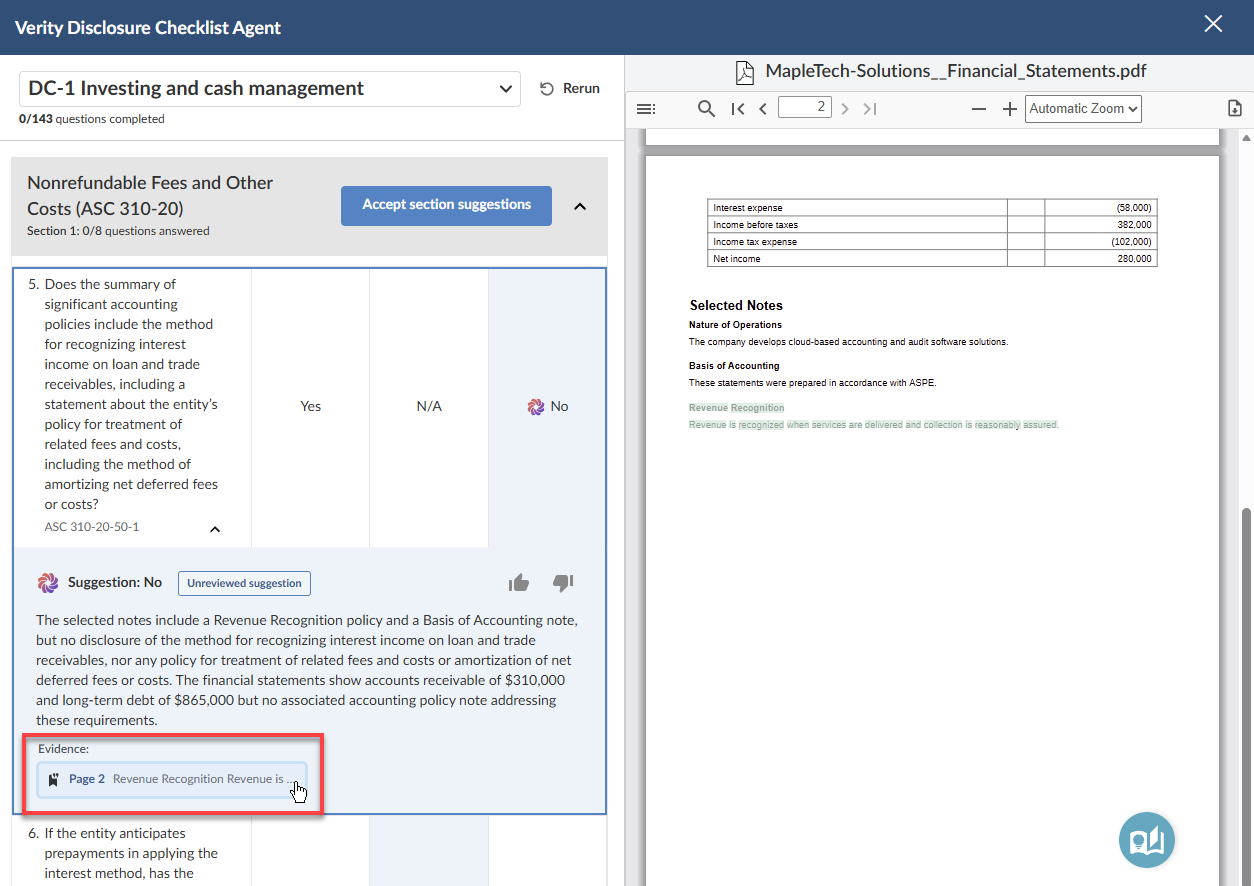
The checklist panel shows your disclosure checklist organized by section. For each question, the Disclosure Review agent displays:
-
The suggested answer — Yes, No, or N/A
-
The reasoning behind the suggestion
-
Citation pills linking to the supporting passages in the financial statement PDF
To review a suggestion:
-
Read the suggested answer and the reasoning provided.
-
Select a citation pill to navigate to the supporting passage in the financial statement. The PDF viewer scrolls to the relevant page and highlights the cited text so you can verify the evidence directly.
-
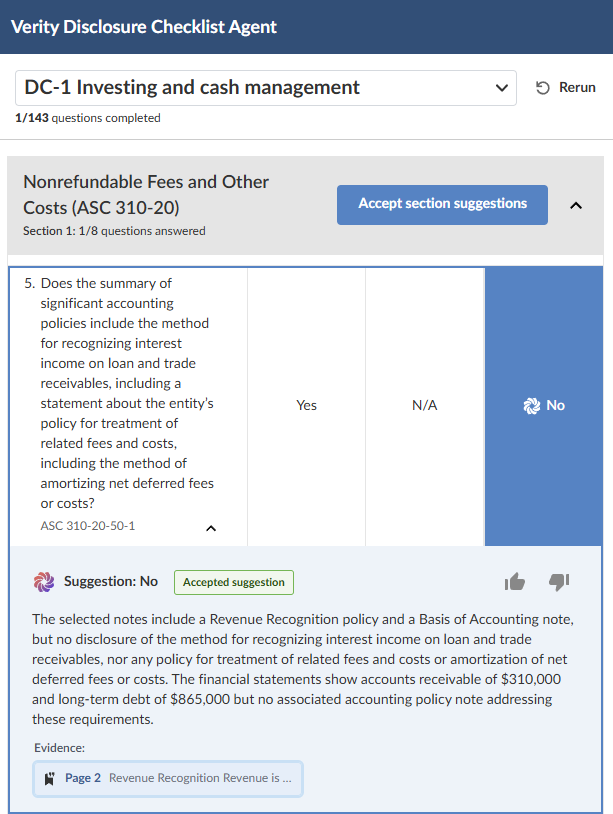
If the suggestion and evidence are correct, select the suggested answer to accept it. The suggestion status updates to Accepted.
-
If the suggestion is incorrect, select a different answer. The suggestion status updates to Rejected and your chosen answer is saved.
-
If a question is flagged as requiring manual review — because the agent could not find sufficient evidence to suggest an answer with confidence — review the question and enter your answer directly.
You can use keyboard navigation to work through suggestions efficiently. Use the arrow keys to move between questions, press 1, 2, or 3 to select an answer option, and press Enter to accept the suggested answer.
Give feedback on suggestions
You can give feedback on individual suggestions to help improve the accuracy of the Disclosure Review agent over time.
To give feedback on a suggestion:
-
Select the thumbs-up (
 ) icon if the suggestion was accurate and useful.
 -
Select the thumbs-down (
 ) icon if the suggestion was inaccurate or unhelpful. A feedback dialog opens — select the issue category that best describes the problem, add any additional comments, and select Send.
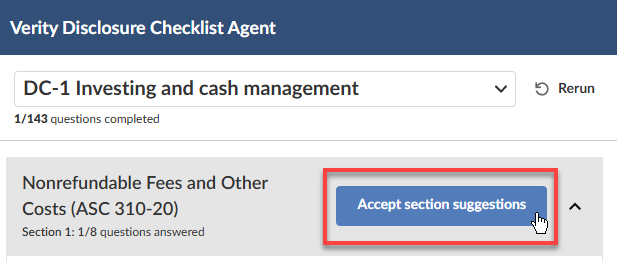
After review
Once you have reviewed all suggestions in a section, you can approve the entire section at once by selecting Accept section suggestions. This saves all accepted answers for the section in a single step.
Only answers you have approved are saved to your engagement file. The Disclosure Review agent's reasoning and citations are available during your review session.