
Assign financial groups to areas and cycles
Areas and cycles in Caseware
Areas and cycles provide different ways to organize financial groups in an engagement.
Areas
Areas let you summarize financial statement groups at a higher level for risk identification and assessment, often at the audit program level. They also let you group items in a different order from the trial balance grouping structure.
You can assign areas to financial groups from the Data page. If the default areas do not meet your requirements, you can add areas to the engagement. To learn more, see Add areas.
Cycles
Cycles let you organize financial groups according to a relevant lifecycle or recurring process defined in your Caseware product.
Assign areas and cycles to financial groups
You can assign an area, a cycle or both to a financial group from the Financial Groups tab on the Data page.
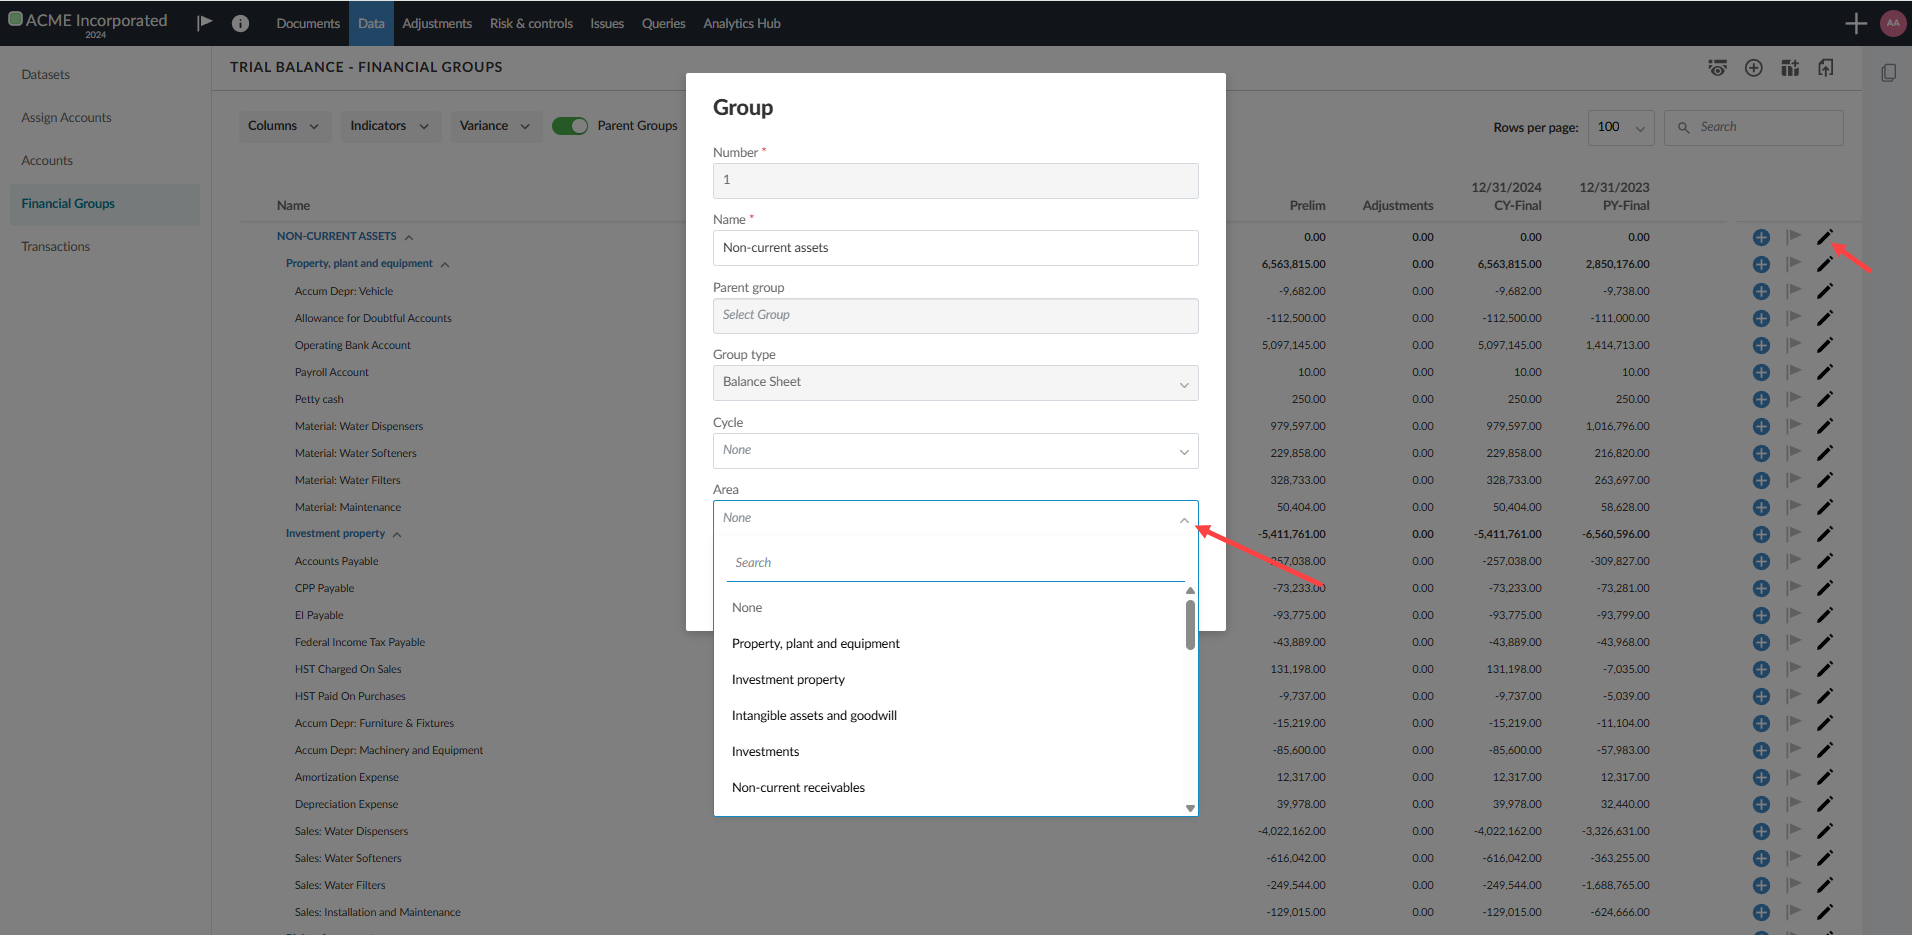
To assign an area to a financial group.
-
In the Data page, select the Financial Groups tab.
-
Navigate to the group you want to modify and select Edit [
 ].
]. -
Select an area to assign from the Area dropdown.
-
Select Save.
To assign a cycle to a financial group
-
In the Data page, select the Financial Groups tab.
-
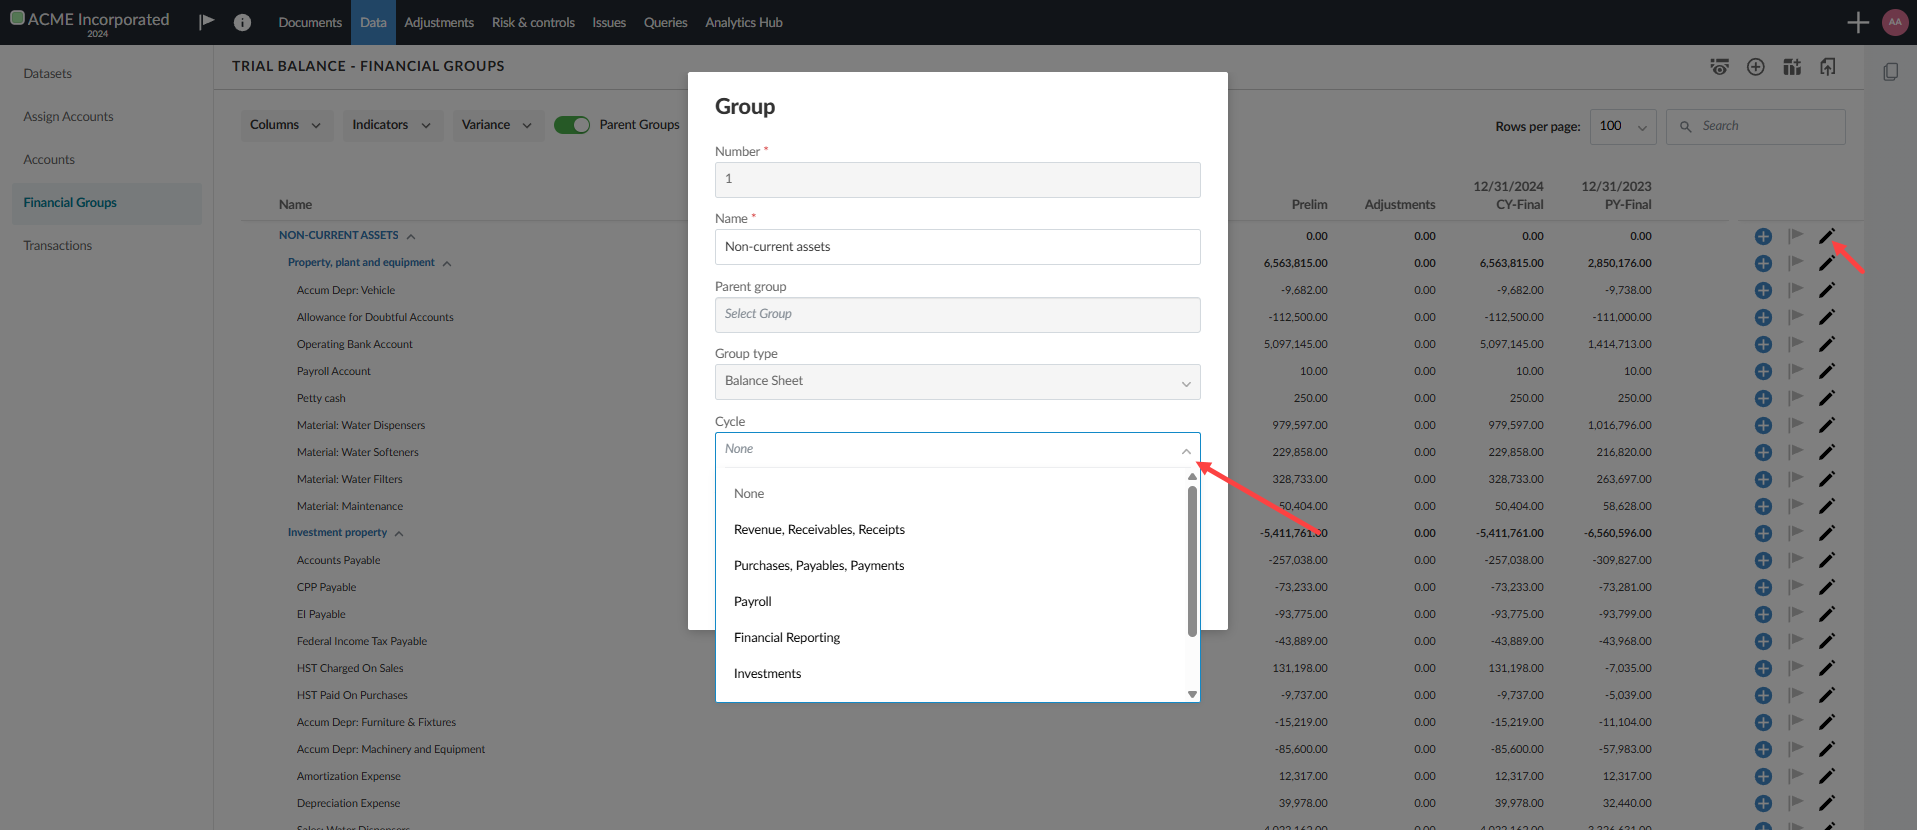
Navigate to the group you want to modify and select Edit [
].
-
Select an area to assign from the Cycle dropdown.
Add areas and cycles to checklists
You can link a single area or cycle to multiple checklists in the checklist settings. Linking multiple checklists to the same area or cycle gives you more flexibility in how you organize and access checklists without restructuring your area and cycle assignments.
When multiple checklists are linked to the same area or cycle, selecting the analysis link on the Risk Assessment page opens each linked checklist in a new tab.
To add an area or cycle to checklists:
-
From the Documents page, open the checklist you want to link.
-
Select the Edit (
 ) icon to open the edit view.
 -
Select the Settings (
 ) icon to open the Checklist dialog.
 -
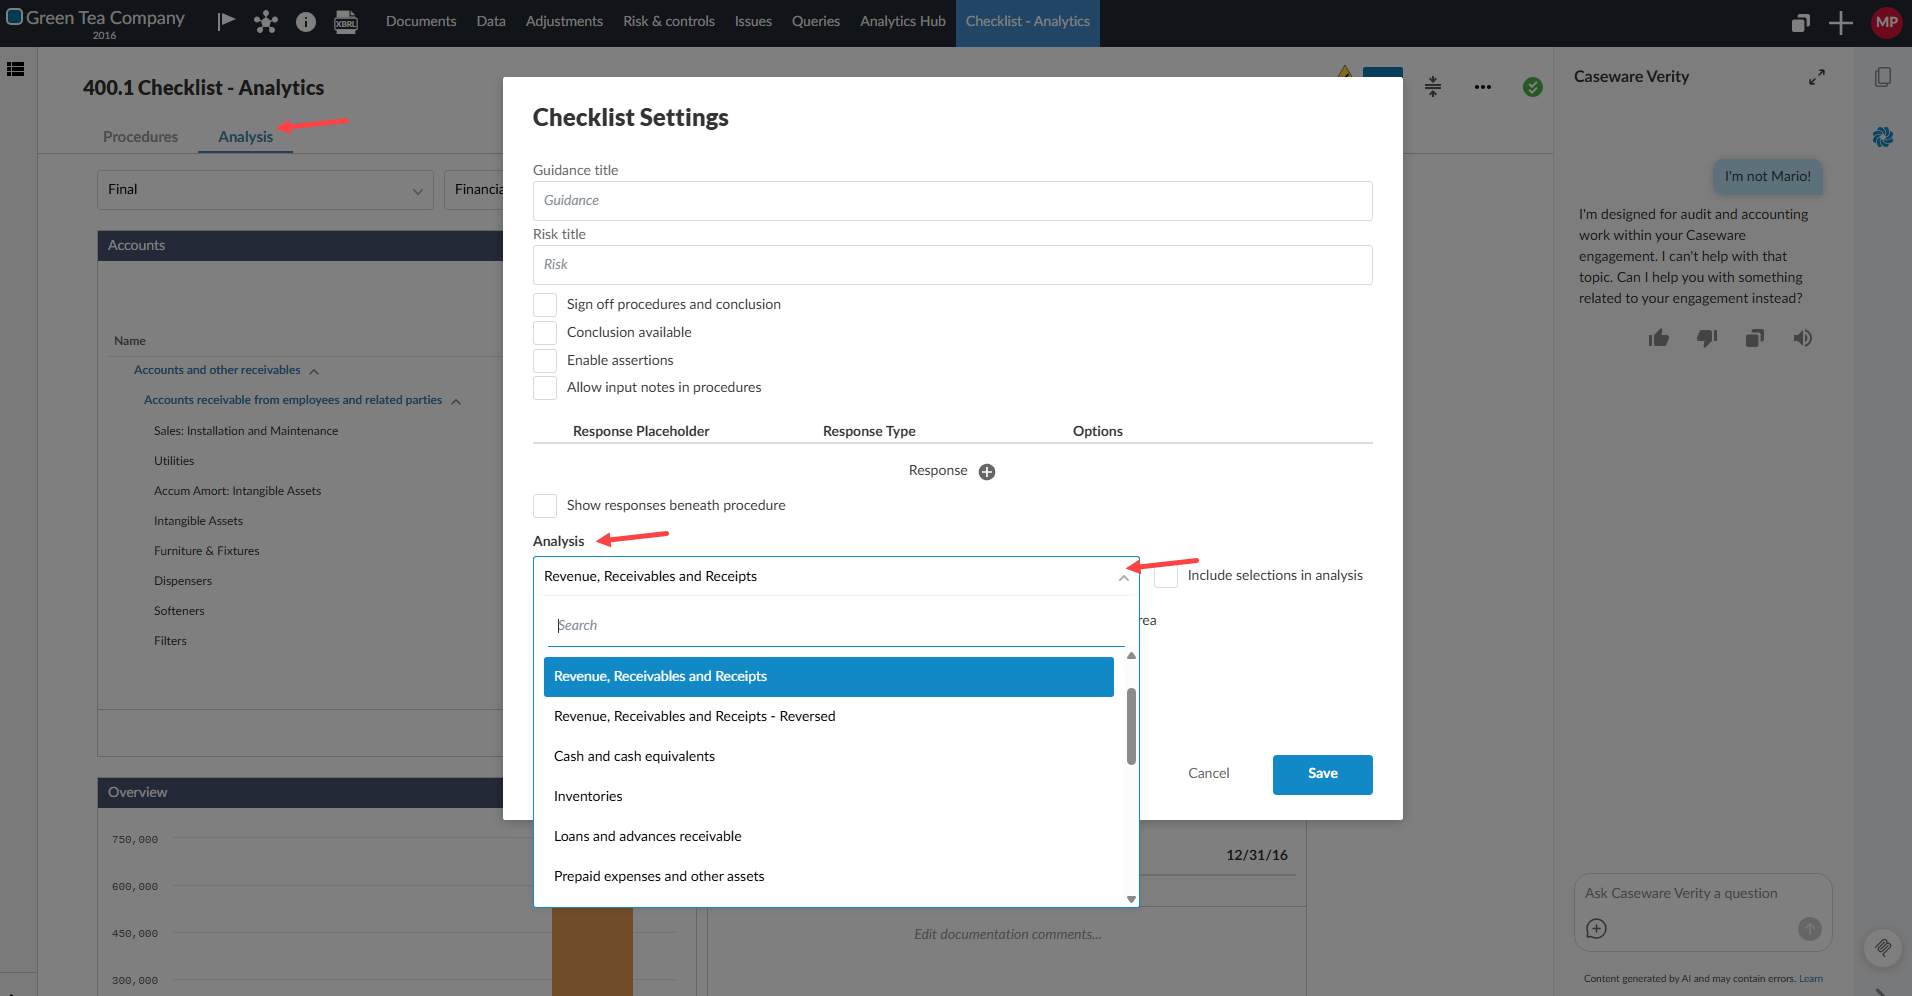
From the Analysis drop-down menu, select an account.
-
Select the Include selections in analysis checkbox.
-
Select the Cycle or Area radio button, then select an account from the corresponding drop-down menu.
-
Save the Checklist settings. Your selections will appear in the Analysis tab of the checklist.
-
Repeat these steps for each checklist that you want to link to the same area or cycle.
To learn more about checklists, see Add a checklist.