
Assign accounts to groups
On the Accounts tab, which you access from the Data page, the Assign Accounts icon can sometimes show a red badge (  ) once you import the trial balance. This means that one or more accounts haven't been assigned to groups. The same happens once you manually add one or more accounts. Note that the red badge shows the number of unassigned accounts. For example, if there are three unassigned accounts, the badge shows 3 ().
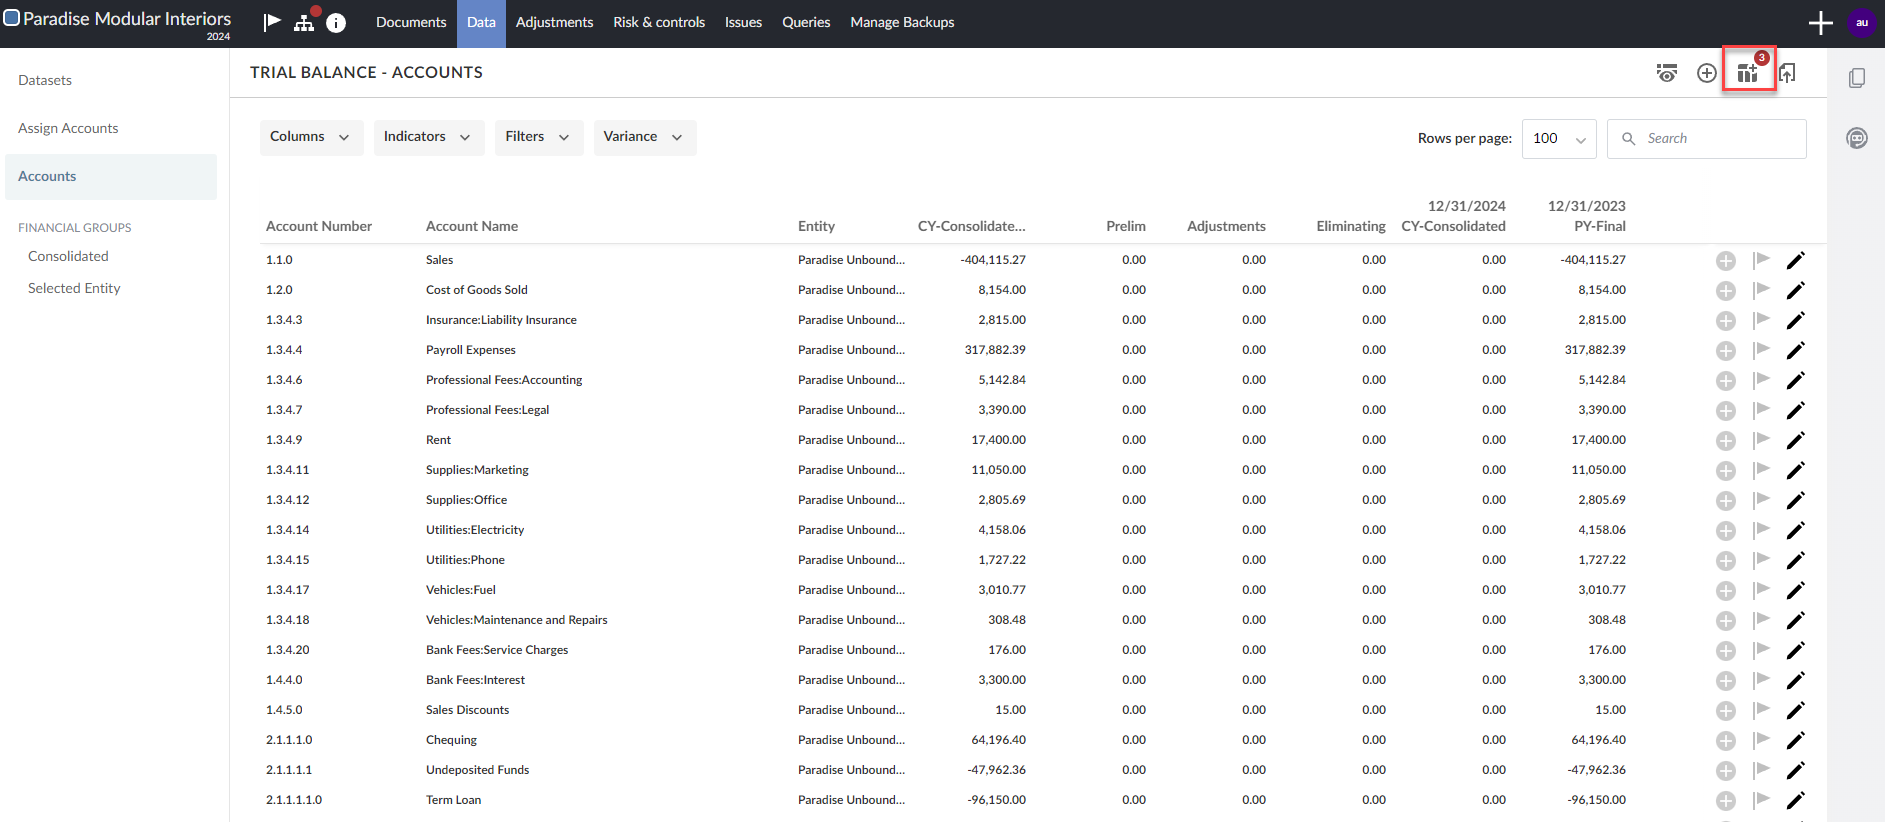
You must manually map unassigned accounts to appropriate groups so that your financial data populates correctly throughout the engagement. If multiple grouping structures are available, assigning an account to a group in the default structure automatically assigns it to linked groups in other structures.
Assign accounts to groups
You can manually assign accounts to groups from the Assign Accounts page.
To assign an account to a group:
-
Select Assign Accounts icon (
) from the top right corner of the Accounts tab, of the Data page.You can also select the Assign Accounts tab from the left-side panel.
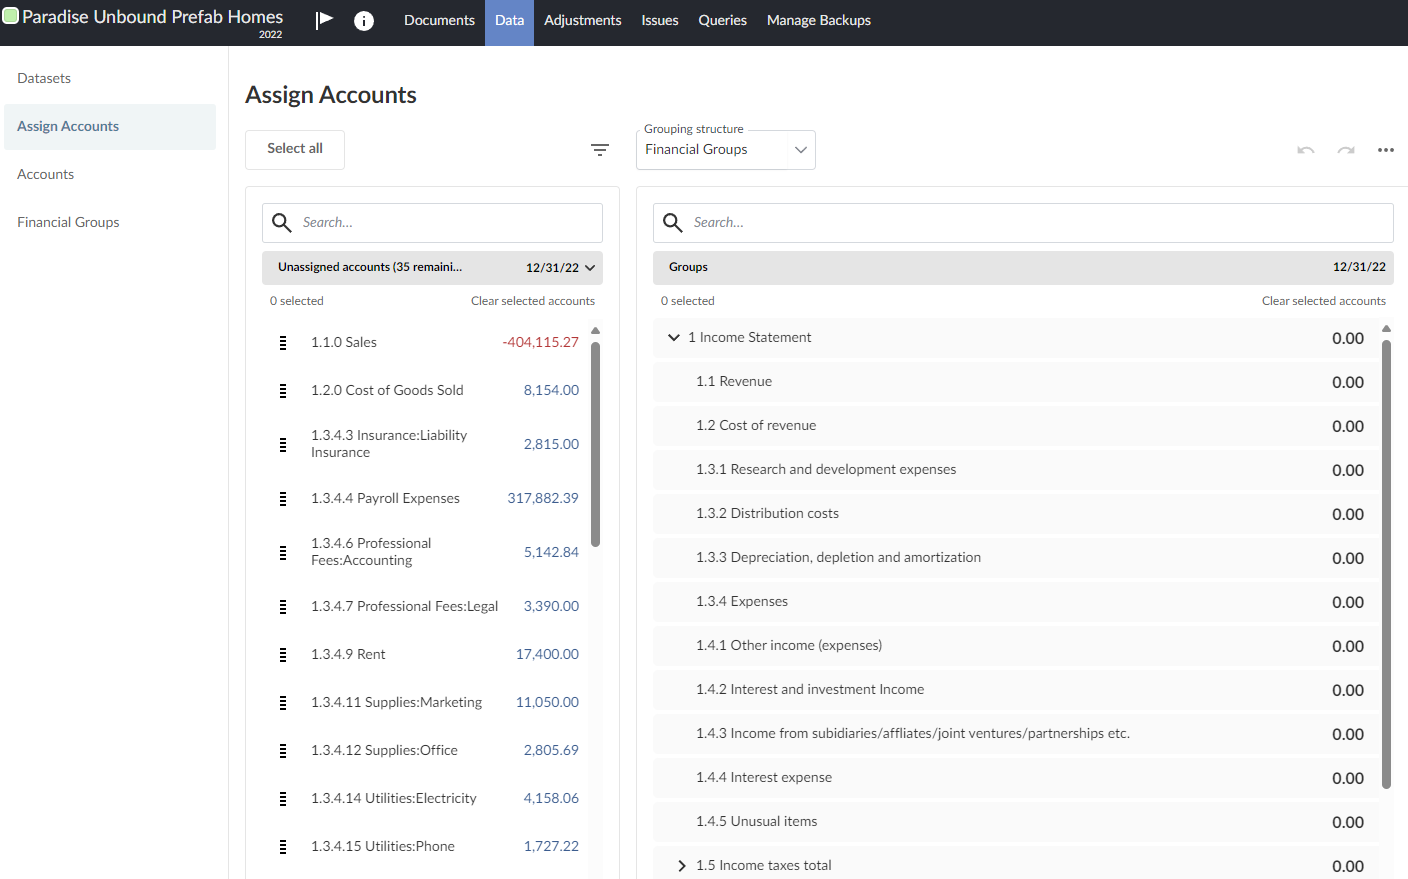
In the Assign Accounts tab, the unassigned accounts are displayed in the Unassigned accounts list.
If your engagement is consolidated, you can use the entity selector dropdown to select which entity you are assigning accounts for.
The financial groups are displayed in the Groups list. If your product has multiple grouping structures, you can use the dropdown to select the grouping structure you want to assign accounts to.
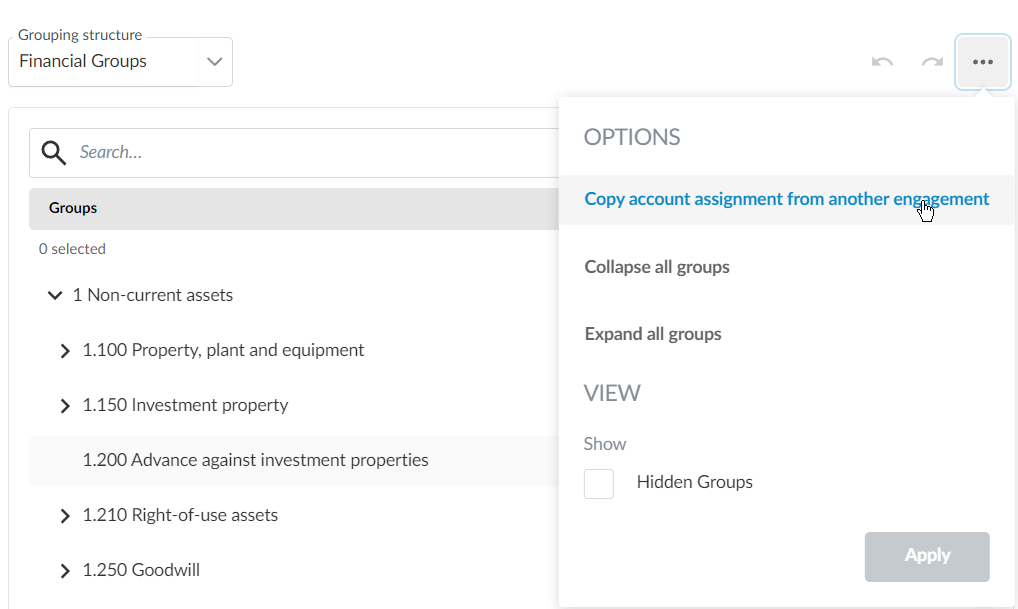
You can select the More actions (
 ) | Show Hidden check box to view groups that have been hidden in the engagement. If you select Show Hidden, the invisible icon (
 ) displays next to the hidden groups so you can spot them in the list.
If components are enabled in your product, you can also filter the Groups list by component. To learn more, see Filter the Groups list by component.
Select a group to assign the selected account to that group.
You can also drag the account from the Unassigned accounts list and drop it in a group to assign it.
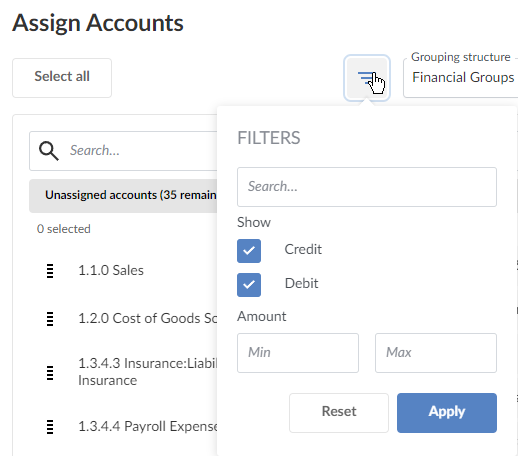
You can use the search box or the filters to find the account you want to assign. The search box allows you to search for accounts based on the number or name. The filters available allow you to filter the unassigned accounts by whether the account has a credit or debit balance, and the balance amount.
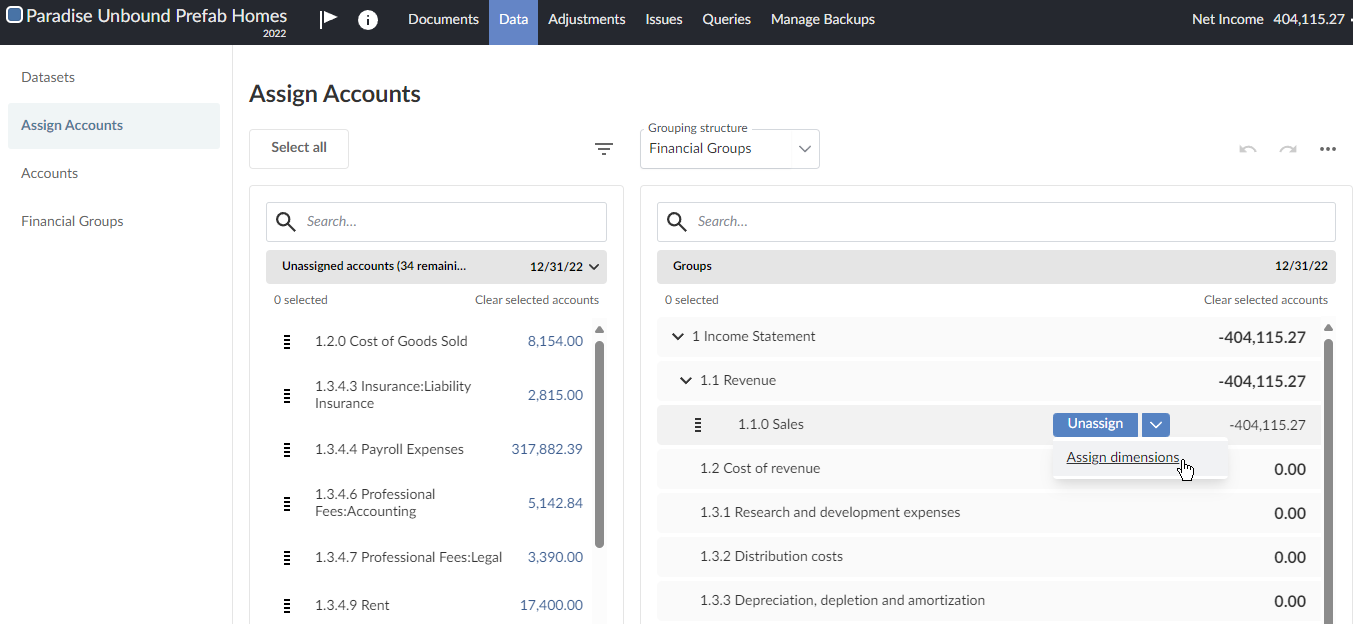
If dimensions are available in your product, you can assign the account to dimensions after you assign it to a group by selecting the Dropdown ( ) icon and then Assign dimensions. Note that while you can assign an account to multiple dimensions, you can only assign one dimension per dimension category.
After you assign an account, you can select Undo ( ), if required, to unassign the account again.

Filter the Groups list by component
If components are enabled in your product, you can filter the Groups list by component so you only see the groups you need for the account you're working on.
To filter the Groups list by component:
-
Select the Filter icon (
 ) above the Groups list to display the FILTERS panel.
 -
Under COMPONENTS, select one or more components. Components are listed under their categories, so you can filter by more than one category at a time. Use the search box to find a component in a long list.
-
Select Apply.
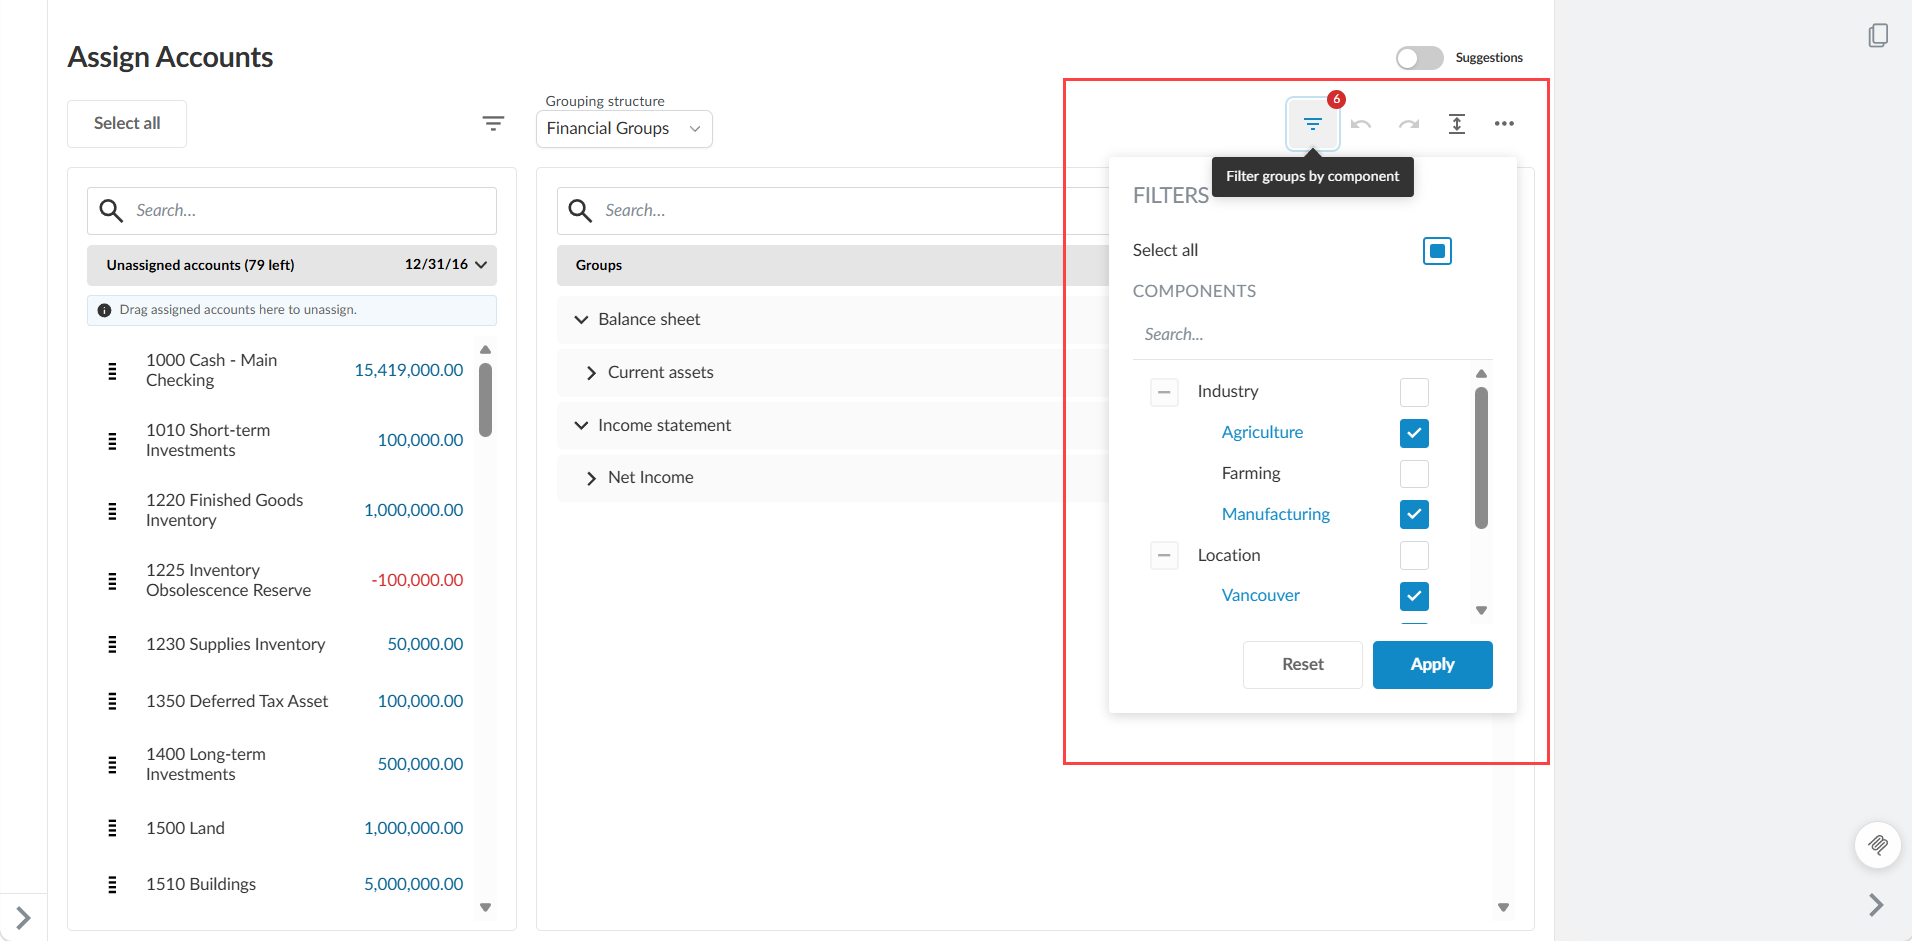
The Groups list shows only the financial groups assigned to the components you selected. Select Reset to clear your selection and restore the complete list or select the Select all check box in the FILTERS panel to select every component.
Filtering doesn't introduce any new visibility rules. Show Hidden is unaffected, and the component visibility rules your firm has configured still apply.
Note: A component only appears in the FILTERS panel when its own visibility conditions are met. For example, a component set to show only when the content language is French doesn't appear in the panel for an engagement whose content language is English.
If a component is occluded and one of its financial groups has an account assigned, that component will not appear in the filter. The financial group is still visible in the Groups list. Use the search box above the groups list to find it.
View and compare multiple trial balances
You can view and compare trial balances with up to four different dates while assigning accounts. Some common examples include the following:
-
Current year (planning and final)
-
Prior year (planning and final)
Notice that there is different behavior on the Assign Accounts tab where there are balances at more than one date. The example below shows the Assign Accounts tab after the import of a trial balance containing:
-
Current year planning balance—9/30/2024
-
Prior year final balance—12/31/2023
-
Prior year planning balance—9/30/2023
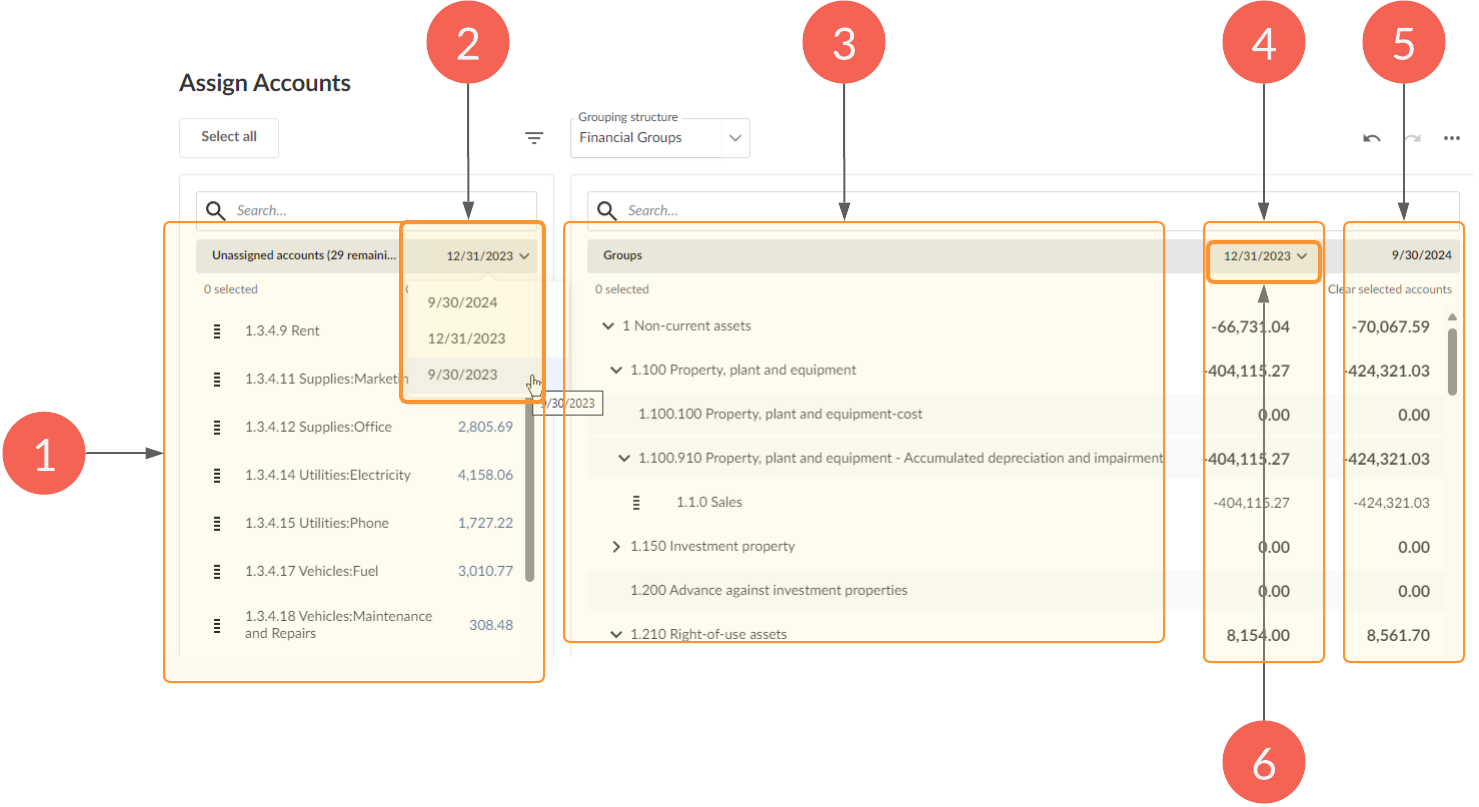
| Element | Description |
|---|---|
| 1 | Unassigned accounts list |
| 2 | Trial balance selector for the Unassigned accounts list |
| 3 | Groups list |
| 4 | Alternative trial balance column |
| 5 | Main trial balance column |
| 6 | Trial balance selector for the Alternative trial balance column |
Dates are synced from left to right. When choosing a different date (2) on the Unassigned accounts list (1), the balances in the Alternative trial balance column (4) in the Groups list change to match automatically. In the example below, we are selecting the planning balance of the prior year–9/30/2023 (2).
Which makes the Alternative trial balance column (4) on the Groups list change to be the same.
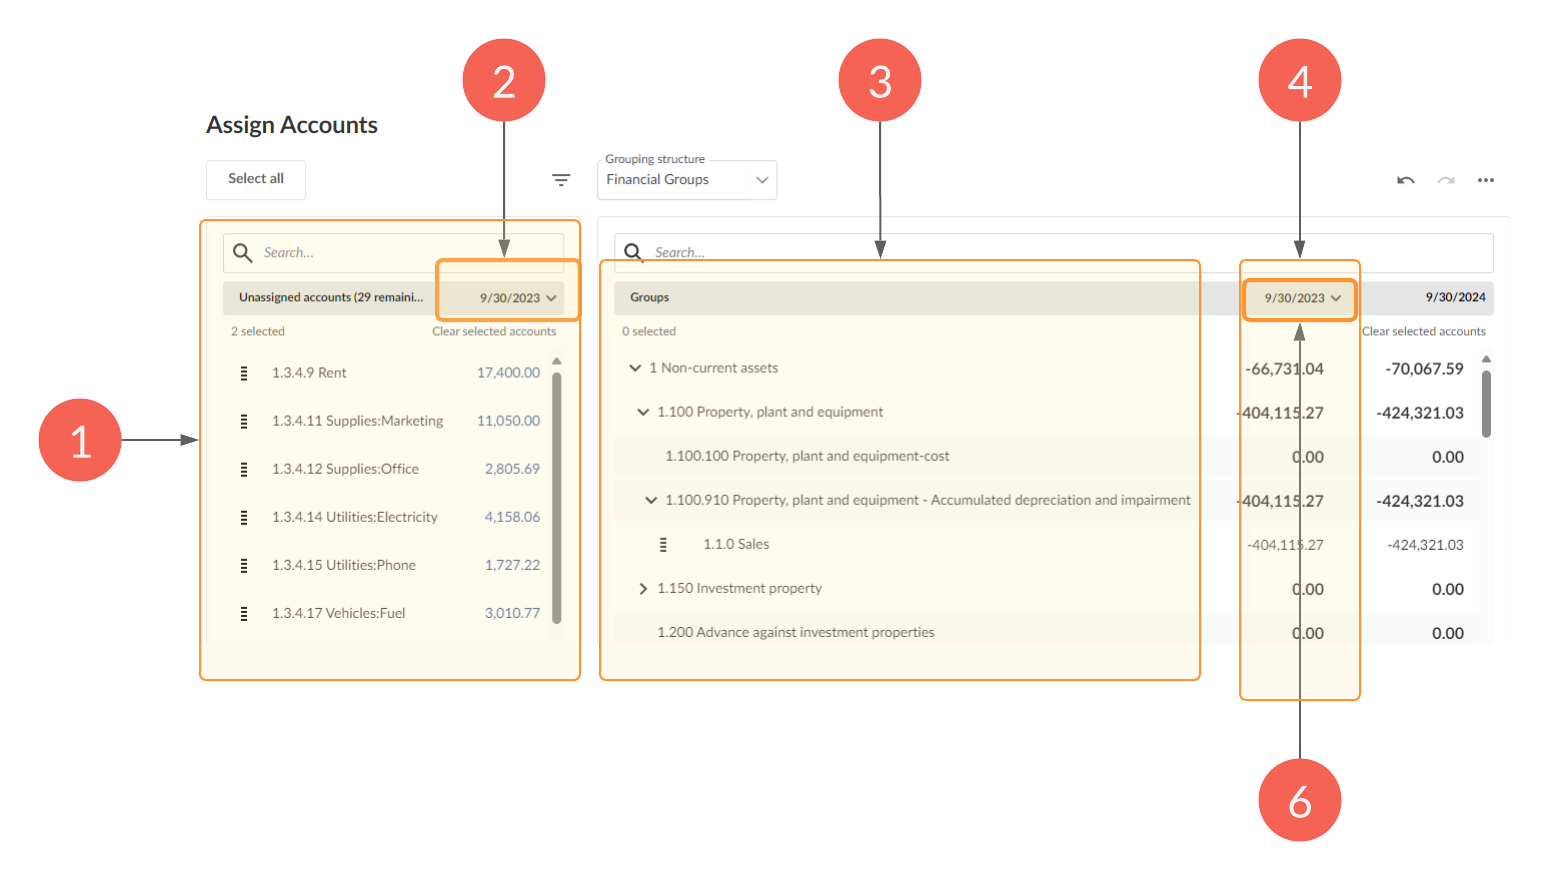
Choosing the balances at a different date (6) in the Alternative trial balance column in the Groups list has no effect on the balances shown in the Unassigned accounts list (1).
Precedence of display
If you import a trial balance as of two or more dates into the engagement, two columns are displayed on the Groups list, with the highest priority balances shown in the Main trial balance column and the other balances shown in the Alternative trial balance column.
Order of priority
-
Current year final balance
-
Current year planning balance
-
Prior year final balance
-
Prior year planning balance
Copy account assignment from another engagement
To simplify the account assignment process, you can copy the account assignment structure from another engagement. This allows you to take advantage of engagements that use the same financial grouping structure and group numbers, so you can automatically assign accounts in your current engagement to match the engagement you’re copying from.
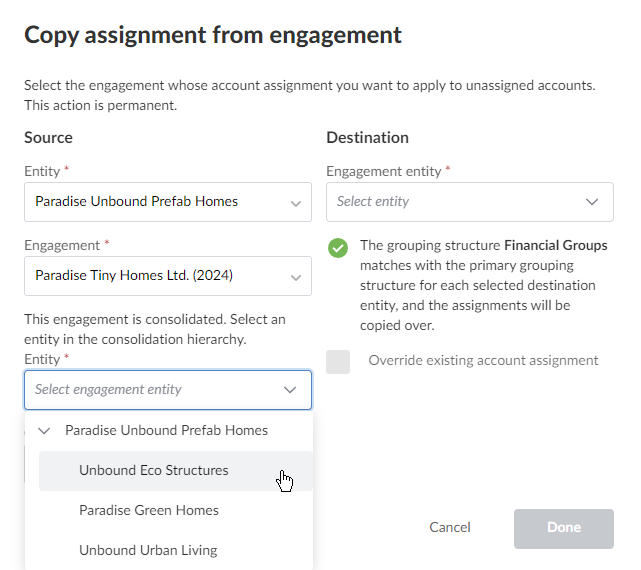
Note: The steps to select an engagement to copy from differ slightly if the engagement you select to copy from is a consolidated engagement.
When you select an engagement to copy from, accounts in your current engagement that have the same account number as the accounts in the other engagement will be assigned to the appropriate financial groups.
To copy an account assignment from another engagement:
-
On the Assign Accounts page, select More actions (
) | Copy account assignment from another engagement.
-
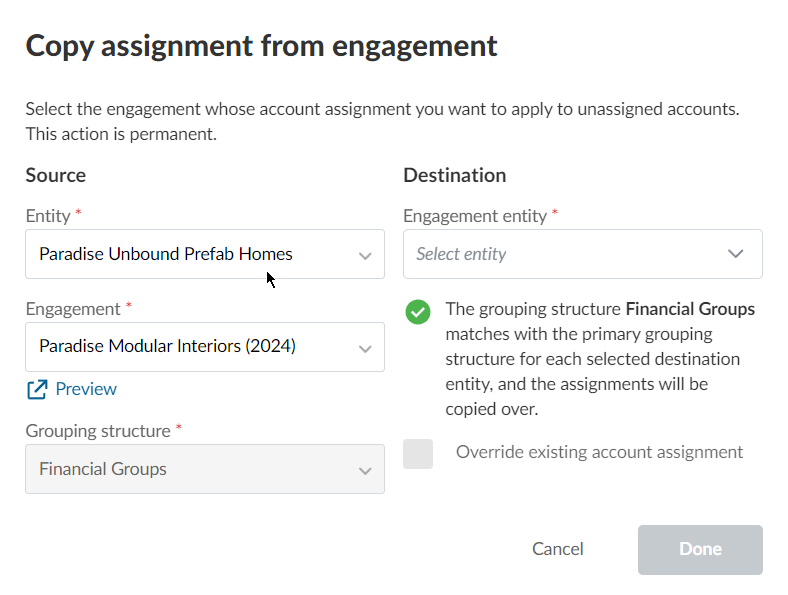
In the Copy assignment from engagement dialog, in Entity, select the entity that contains the engagement you want to copy from.
-
In Engagement, select the engagement from which you want to copy the account assignment.
If you are copying from a consolidated engagement, you are prompted to select the entity to which the consolidated engagement belongs:
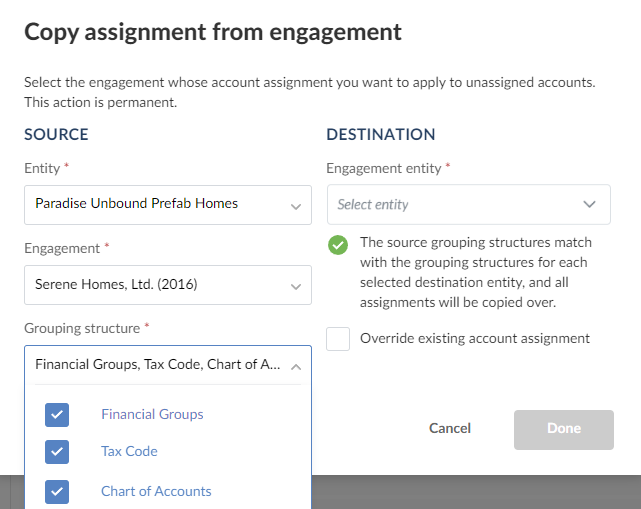
You can also copy account assignments from multiple financial group structures by selecting the financial groups in the source engagement to copy over, in Grouping structure.
If the grouping structure for accounts matches the current engagement, a success indicator appears, and the name of the grouping structure appears in Grouping structure.
-
In Engagement entity under Destination, Select the engagement to which you want to apply the account assignment. You can copy account assignments from another engagement to multiple entities in your current engagement by selecting the destination entities from the dropdown.
If you want to override any existing account assignments you’ve made, select Override existing account assignment. If you don’t select this option, your existing account assignments remain unchanged and only accounts that are currently unassigned are assigned.
-
Select Done.
Unassign accounts from groups
You can manually unassign accounts from groups in the Assign Accounts tab.
To unassign an account from a group:
-
In the Assign Accounts tab, navigate to the group you want to unassign accounts from.
-
Select and drag the accounts assigned to the parent group to the Unassigned section.