1-2 Column Income Statement Schedule
| Number | Name | Description |
|---|---|---|
|
|
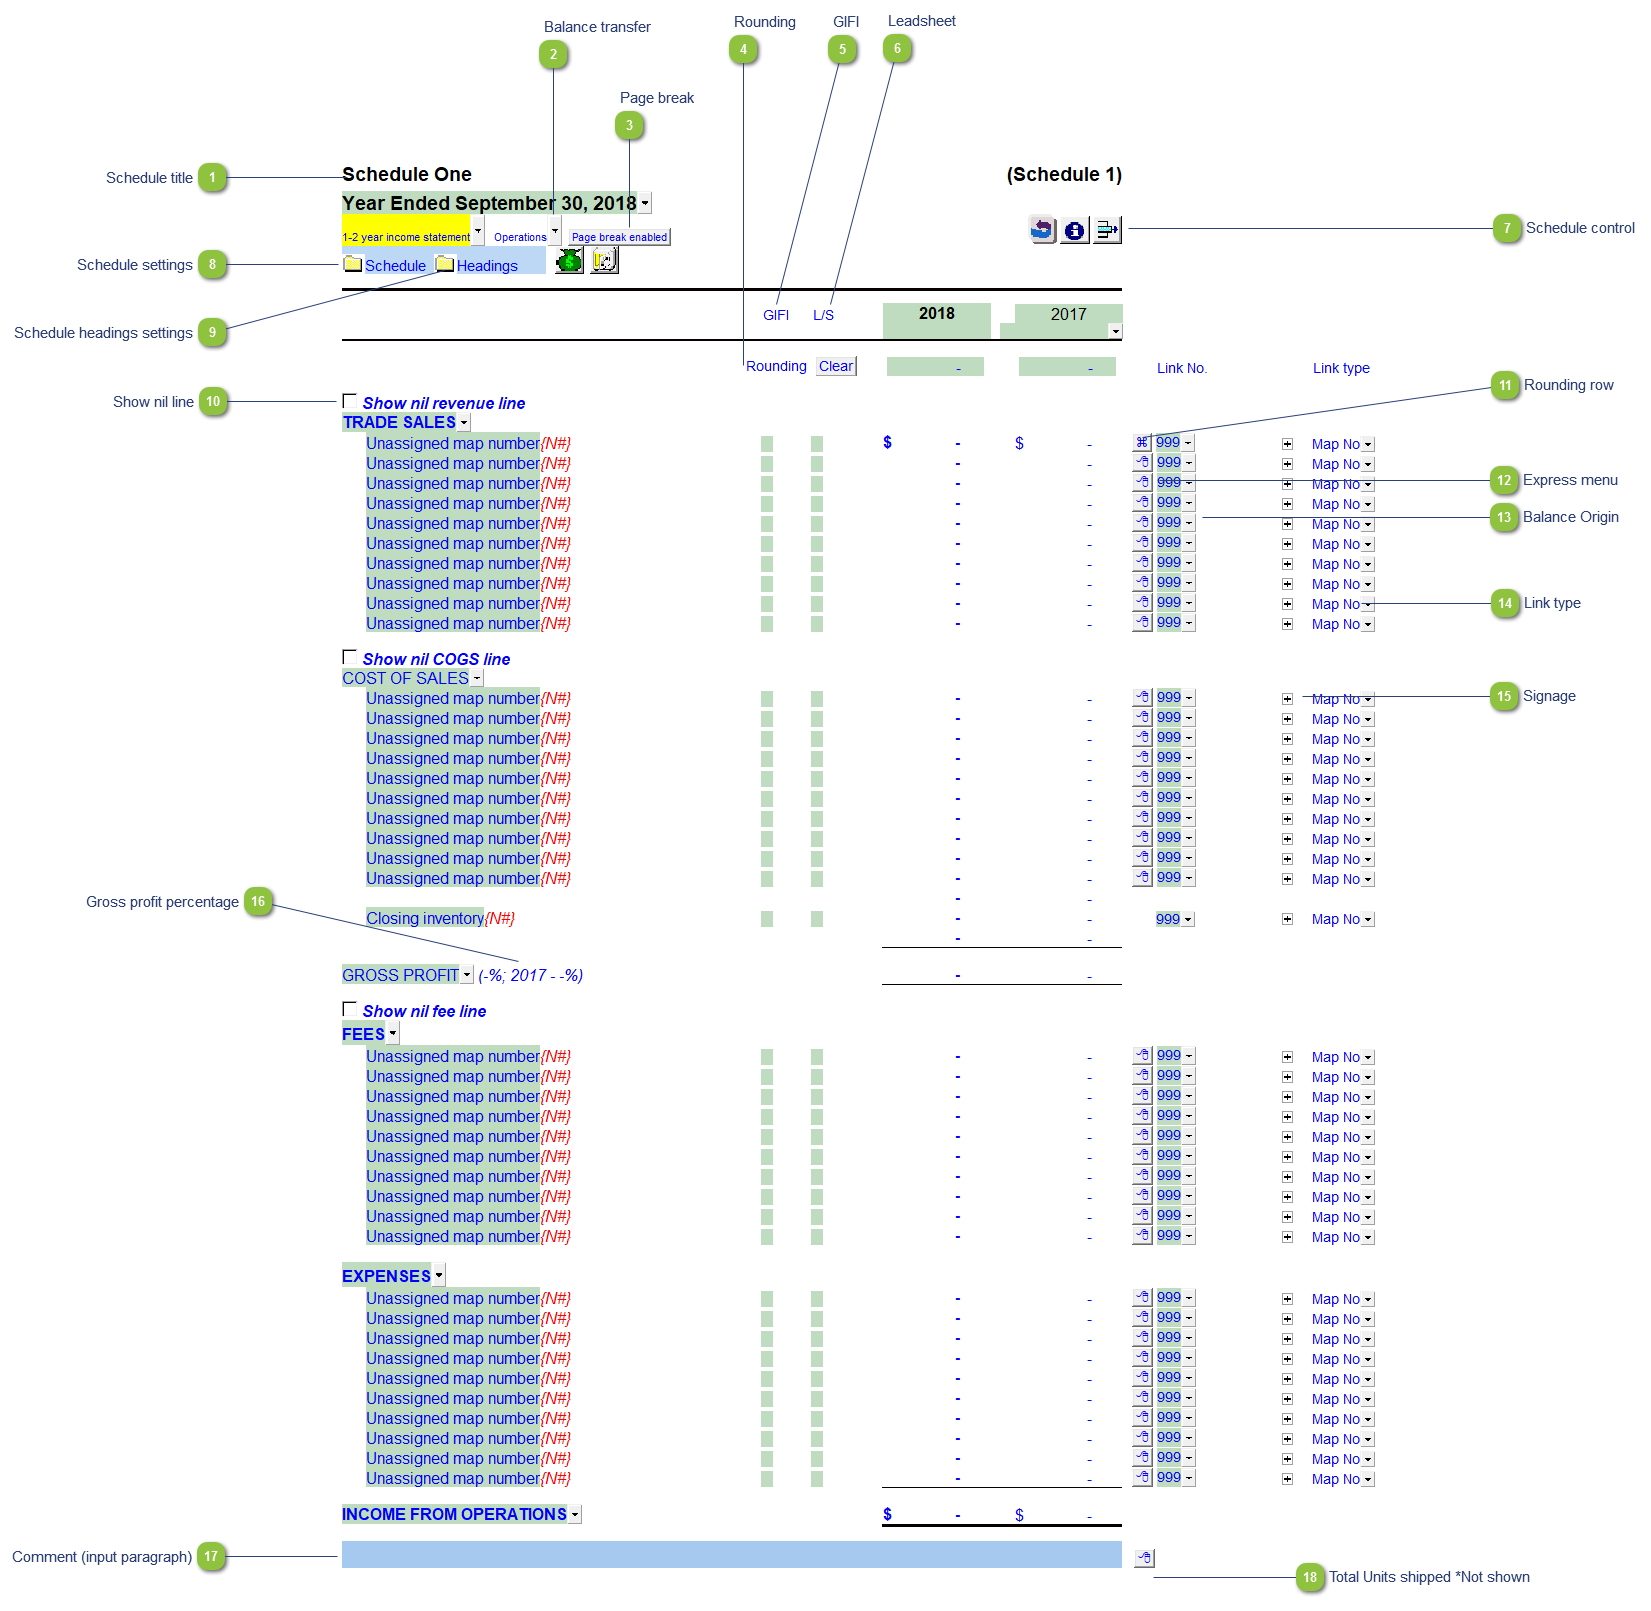
Schedule title |
Customizable schedule title which appears at the top of the schedule and on the Index Page. |
|
|
Balance transfer |
Select from the dropdown if the schedule total should be included in the following Income Statement areas:
|
|
|
Page break |
Select if the page break should be enabled at the top of the schedule. |
|
|
Rounding |
Enter amounts for rounding of the schedule if needed. The rounding amounts will be plugged into the designated rounding line which is indicated by
|
|
|
GIFI |
The GIFI code for each line item is shown. Double-click on the GIFI code to see which accounts are linked to that code. You can set the GIFI column to Display and print, Hide or Display in the Display section of the Home Menu. |
|
|
Leadsheet |
The leadsheet group for each line item is shown. Double-click on the leadsheet number to see which accounts are linked to that leadsheet. You can set the GIFI column to Display and print, Hide or Display in the Display section of the Home Menu. |
|
|
Schedule control |
Left-click the button to delete the schedule. Right-click the button to reload the schedule from the Resource Centre. |
|
|
Schedule settings |
Open the SCHEDULE folder to find the following schedule settings:
|
|
|
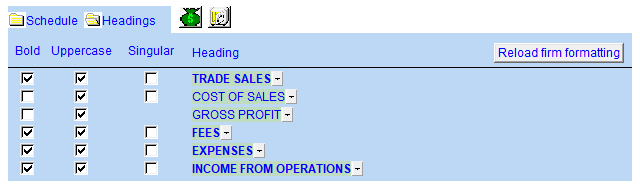
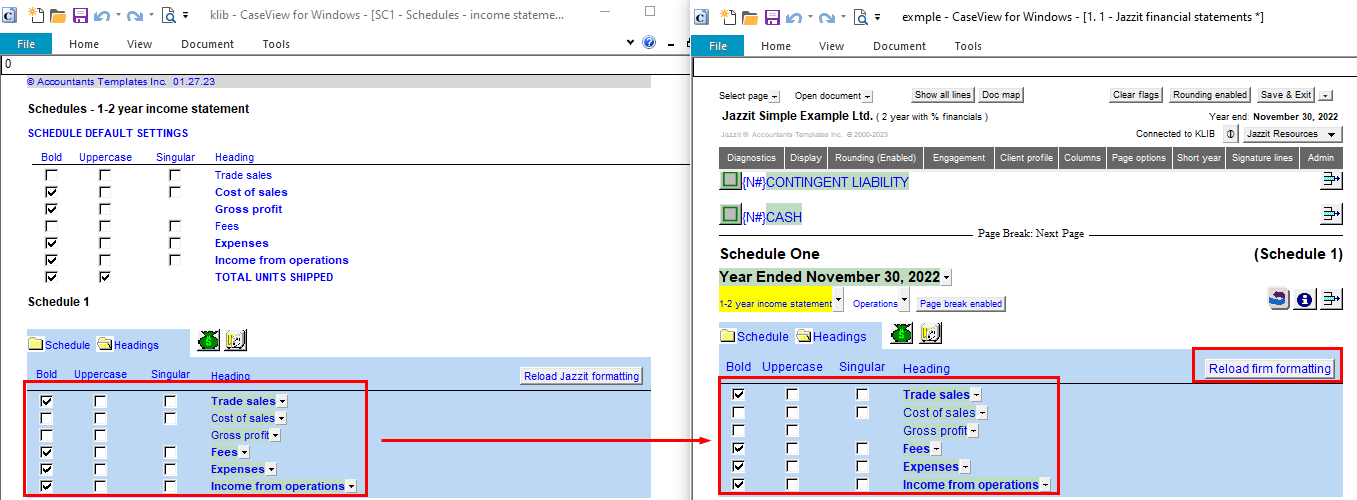
Schedule headings settings |
Open the Headings folder to find the following schedule headings settings. Settings will now retain on update. See Statement Section Headings Formatting for more information.
|
|
|
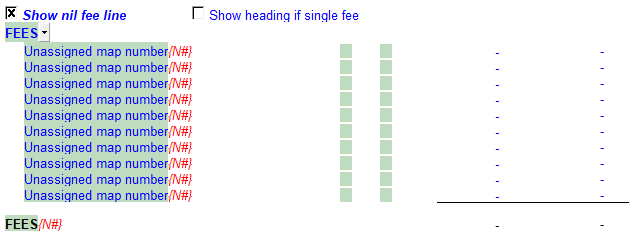
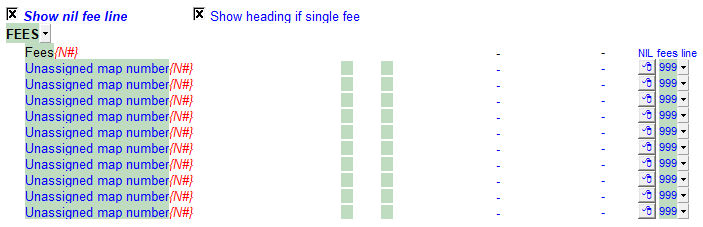
Show nil line |
Select the tickbox if you would like a section without balances to print a total nil balance line.
Once selected, you can choose to rather display the section heading with a single nil line instead.
|
|
|
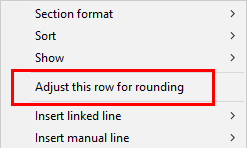
Rounding row |
To apply the rounding difference to a row, right-click on the express menu and select Adjust this row for rounding. The
|
|
|
Express menu |
Right-click on the express menu to insert more linked or manual lines, insert subtotals, sort and delete current lines where the options are available. |
|
|
Balance Origin |
The link number indicates which linked number (i.e. map number) the row is linked to. Use the popup menu to select a link number. This can be a map, account or group number depending on the link type selected. Refer to Balance Origins for more information. You can also double click on the balance origin for lines to link to a generic note. |
|
|
Link type |
The link type is set from the default link type selected. You can change the link type for the individual row item if different from the default link type. |
|
|
Signage |
This allows you to change the sign of the linked rows. Changing the sign will affect the calculation. |
|
|
Gross profit percentage |
Displays the percentage of gross profit for the current and prior year. The percentages can be set in the schedule settings. Right-click on the Gross Profit cell to either show or hide the percentages and decimal places. |
|
|
Comment (input paragraph) |
You can edit existing input paragraphs or insert more paragraphs using the express menu. Refer to Input Paragraphs for more information on inserting paragraphs. |
|
|
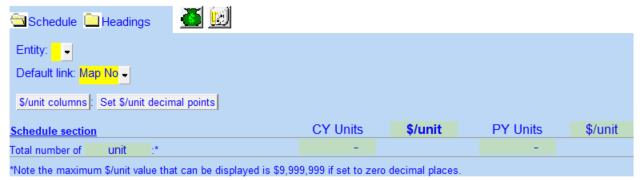
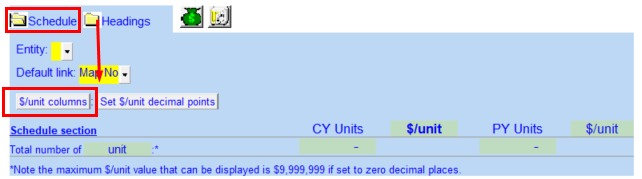
Total Units shipped *Not shown |
Decimal points can also be modified here.
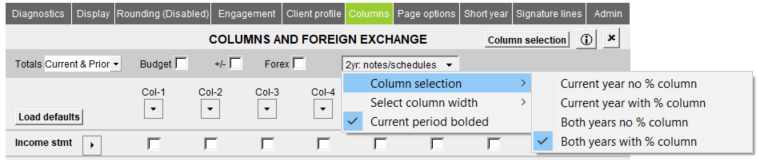
In the schedule you need to enable $/unit columns to have this line show. To do this go to Columns in the home menu and enable % columns.
Then go to Schedule options and enable $/unit columns.
|