
Insert data using the Cloud Connector pane
You can use the right pane to retrieve and insert data from the engagement into the Excel file.
Note that your starting point is always the Documents page:
-
Go to the Documents page.
-
Open the Excel file.
-
Select the Datalink icon from the ribbon.
A pane opens on the right side showing two data source links: Trial Balance and Properties.
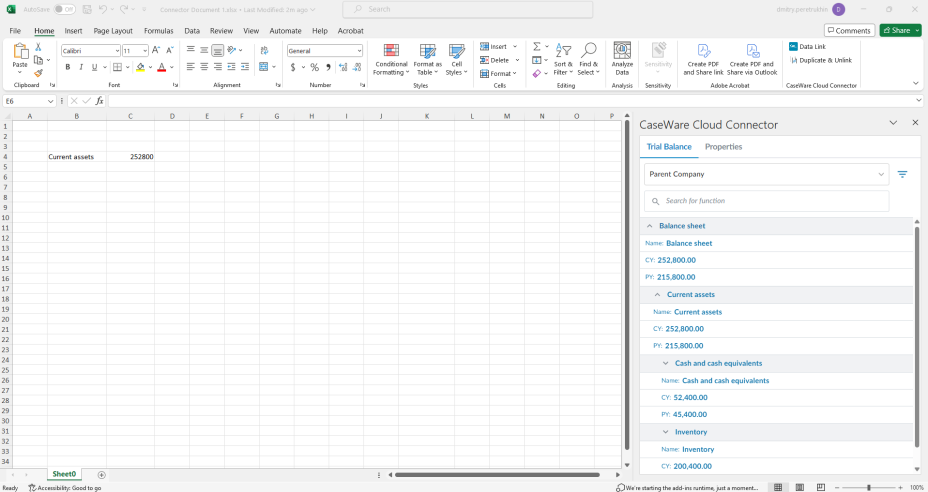
To insert trial balance data:
-
Select the cell where you want to insert trial balance group data.
-
Go to the right pane and locate the desired group under the Trial Balance tab. Use the down arrows (
 ) to expand parent groups if needed.Tip: You can also use the search field at the top. You can search by group name or group number.
 -
Use the filters (
 ) to select which columns you want to add for the group and its subgroups. For example, if you want to insert the group number, name, the current year balance and the prior year balance, select the filters for those columns.
If you want to include zero balance accounts, select the Insert zero-balance items filter.
If your engagement is consolidated, you can select an entity in the consolidation data to display data for that entity. You can also use the Consolidated filter to select whether to insert consolidated or non-consolidated data.
-
Select the Add groups and subgroups icon (
 ) next to the group.
The group you selected and all its subgroups are inserted in the file.
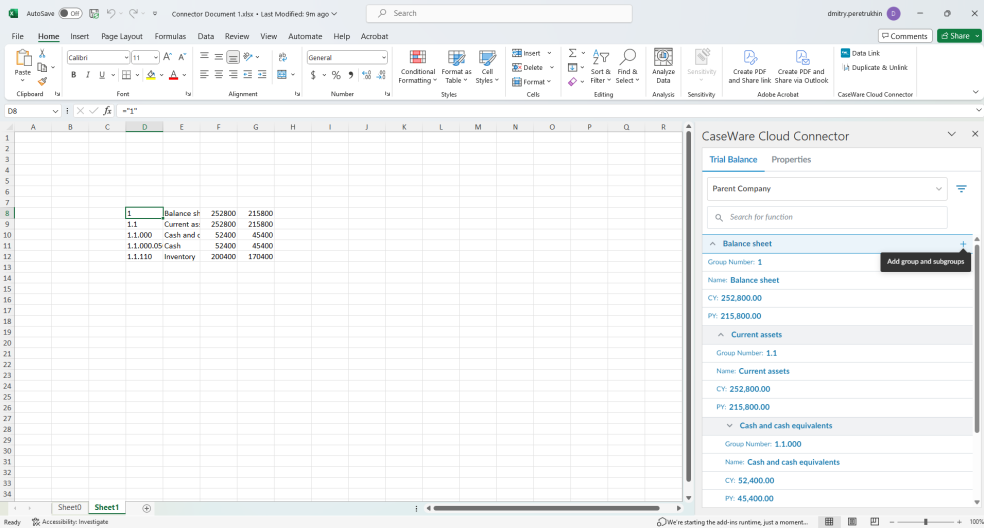
To insert an engagement property:
-
Select the cell where you want to insert an engagement property.
-
Go to the right pane and select the Properties tab.
-
Locate the engagement property that you want to insert.
Tip: You can also use the search field at the top. -
Select the Insert Property Link icon (
).The information is fetched from the engagement and inserted in the cell.
To insert a firm property:
-
Select the cell where you want to insert an engagement property.
-
Go to the right pane and select the Properties tab.
-
Scroll down to the Firm Properties section.
-
Select the Insert Property Link icon (
) to insert the Firm name or the Firm address.The information is fetched from the engagement and inserted in the cell.
You can use operators with Cloud Connector formulas to perform calculations.
#BUSY! means that it's taking a few moments to load the data into the cell.
#VALUE! means that the data cannot be found. For example, if the firm address has not been entered, #VALUE! displays in the cell.
To insert balance types
You can link balance types from Cloud Engagements into your Excel document. The additional balance types simplify balance verification and analytical reviews, enabling more flexible and meaningful analysis within Cloud Engagements.
-
When budgets are enabled in Product Settings, you can also compare budget balances. Tax balance types are available when tax is enabled in Product Settings.
-
Interim Planning, PY2, PY3 and PY4 do not support adjustments or preliminary balances. Parent balances cannot be added. Only the specified balance types are supported.
-
The right pane supports expand/collapse for groups and accounts. All drop-down menus are keyboard accessible.
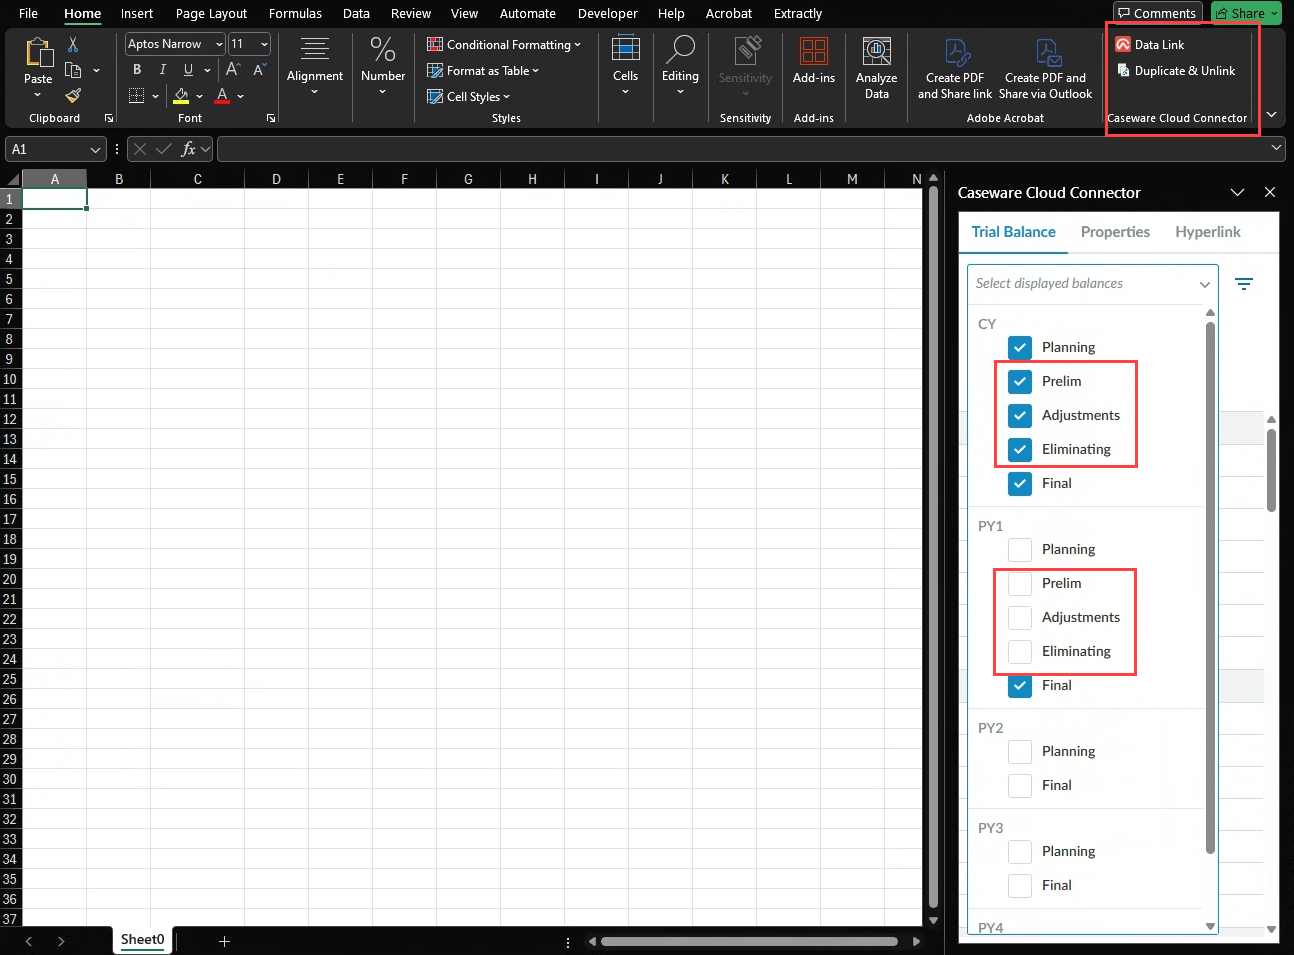
List of balance types for both current year and prior year 1:
-
Planning
-
Prelim (Preliminary)
-
Adjustments
-
Eliminating
-
Final
Tax balance types
-
Tax Final
-
Federal Tax Adjustments
-
State Tax Adjustments
-
Local/City Tax Adjustments
-
Budget balance types (current year only)
-
Initial Budget
-
Revised Budget
To insert balance types:
-
Select the cell where you want to insert the balance.
-
Go to the right pane and locate the desired group under the Trial Balance tab.
-
Use the Balance type dropdown to select the balance you want to insert (for example: Final, Planning, Initial Budget).
-
Select Add groups and subgroups to insert the data.
Inserting tax and budget balance types for interim reporting periods
When your engagement uses interim reporting periods (monthly or quarterly), you can insert tax and budget balances scoped to a specific period.
-
YTD values — the balance reflects the year-to-date total through the selected period.
-
Period movement — you can retrieve the movement for a specific period (the difference between that period's YTD and the preceding period's YTD). For the first period of the year, movement equals that period's YTD value.
Interim period support works in both Offset and Fixed period modes, including CWI.PERIODOFFSET(index).
To insert entity and dimension IDs
You can insert entity and dimension identifiers using Cloud Connector. This lets you add static values such as entity name, entity ID, dimension name, dimension category ID and dimension ID without manually copying values from Caseware Cloud.
Inserted values are static and do not change if the source entity or dimension name changes later in Cloud. This supports more reliable reporting structures, especially for engagements that use many entities, deep hierarchies or multiple dimensions. In addition, inserted identifiers are engagement-specific. They don’t automatically remap when an Excel file is reused in another engagement.
The insertion behavior is similar to inserting data from the trial balance, including how the sheet adjusts when there is limited space.
-
Select the cell where you want to insert entity or dimension ID.
-
Go to the right pane and locate the desired group, under the Trial Balance tab. Use the down arrows (
) to expand parent groups. -
Select the entity or dimension row that you wish to add to your Excel sheet.
Balance types
You can now link more balance types from Cloud Engagements into your Excel document. The additional balance types make it easier to verify balances and run analytical reviews. When budgets are enabled, you can also compare budget balances.
List of balance types for both current year and prior year 1:
-
Planning
-
Prelim (Prelimary)
-
Adjustments
-
Eliminating
-
Final
Additional balance types (current year only):
-
Initial Budget
-
Revised Budget
Budget balance types are available when budgets are enabled in Product Settings.
To insert balance types:
-
Select the cell where you want to insert the balance.
-
Go to the right pane and locate the desired group under the Trial Balance tab.
-
Use the balance type dropdown to select the balance you want to insert (for example: Final, Planning, Initial Budget).
-
Select Add groups and subgroups to insert the data.
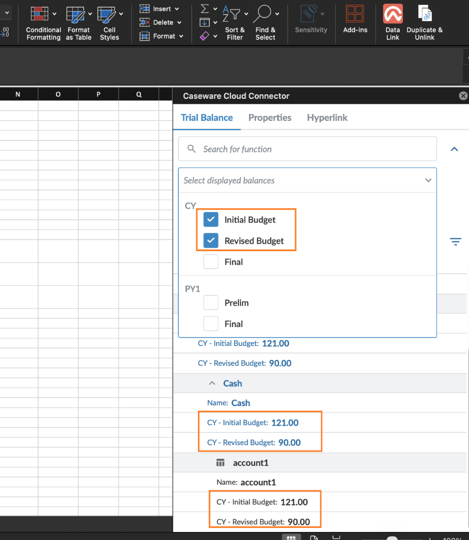
Feature highlights
-
All new drop-down menu options are fully keyboard accessible.
-
Use the expand/collapse all feature for groups and accounts to improve navigation.
Notes
-
Interim Planning, PY2, PY3 and PY4 do not support adjustments or preliminary balances.
-
Budget balances (Initial Budget and Revised Budget) are only available when budgets are enabled in Product Settings. Only current year budget balances are shown in the pane.
-
Parent balances cannot be added.
-
Only the specified balance types are supported.
Duplicate & Unlink feature
The Duplicate & Unlink feature allows users to easily share files with clients and contacts by unlinking documents that have been pre-populated by Cloud Connector.
-
Select the area in the MS Excel sheet that you want to copy, then click Duplicate & Unlink.
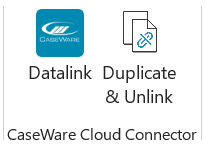
This will automatically unlink the selected sheet and create a duplicate with unlinked values. You can copy the duplicate to whichever app (for example: Word) you want to use to create reports for your clients.
Build multi-function formulas in Cloud Connector
Cloud Connector lets you combine multiple trial balance functions, numbers and mathematical operators in a single Excel cell. The Formula builder helps you create the calculation without manually writing the formula syntax.
You can combine functions with addition, subtraction, multiplication and division operators. You can also use parentheses to control the order of calculations.
The Formula builder supports numeric trial balance data. It doesn't support properties, text or group-description functions.
To build a multi-function formula:
-
In Microsoft Excel, select the worksheet cell where you want to add the calculation.
-
In the Cloud Connector pane, select Formula builder [
 ].
]. -
Configure the parameters for the first trial balance function.
-
The available parameters depend on the function and can include entity, account, group and period.
-
-
Select anywhere on the row to add the function to the formula bar.
-
Select a mathematical operator or parenthesis from the builder toolbar.
-
Configure additional functions and select + to add each function to the formula.
-
You can also add numbers to the formula as needed.
-
-
Review the complete calculation in the formula bar at the bottom of the pane.
-
Select INSERT to apply the formula to the selected Excel cell.
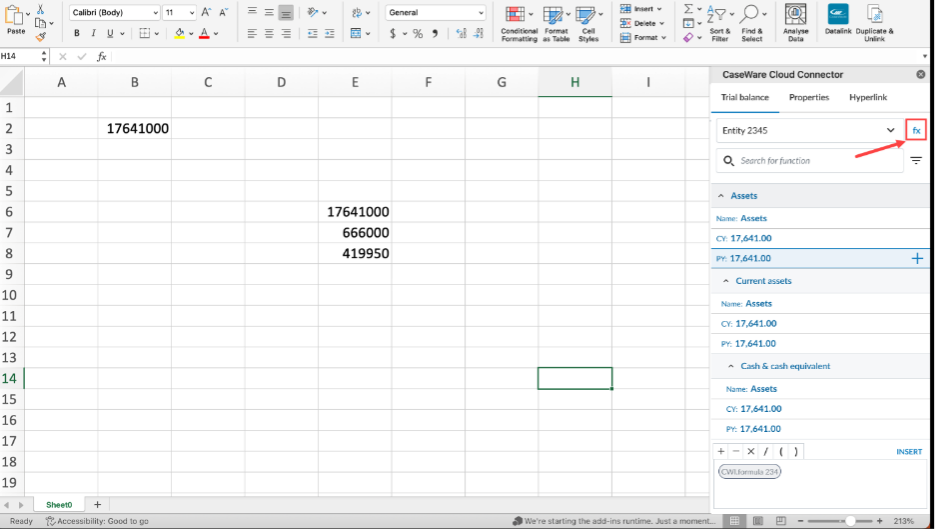
After you insert the formula, you can edit it from the Excel formula bar. You can't reopen and edit the combined expression in the Formula builder.
Multi-function formulas can help you create calculations such as:
-
Variance percentages across multiple reporting periods.
-
Custom subtotals that combine separate balance sheet or income statement lines.